Tips, tricks and the latest news from Baruchi

pocket door systems

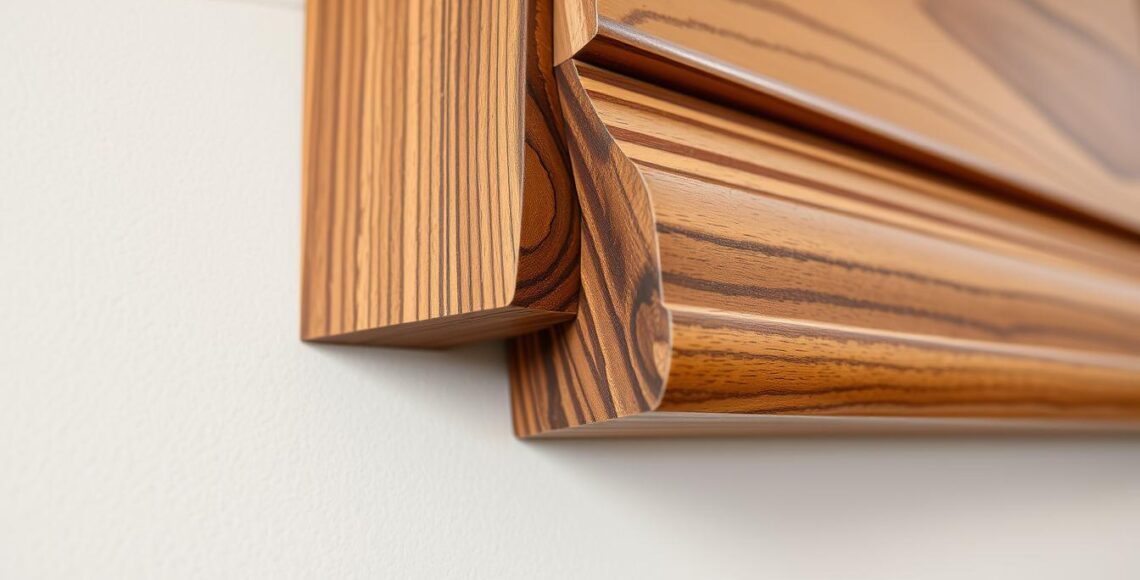
Pocket Door Solutions: Engineering Large Cabinet Doors That Disappear

We specialize in creating pocket door systems that make spaces look better and work better. Our team is great at making big cabinet doors that slide into the wall. We aim to make architectural dreams come true by combining precision with expertise.

We use the latest in door mechanisms and track systems. This helps us offer top-notch custom cabinetry solutions. These solutions are perfect for architects and contractors.

Our team works hard to create pocket door systems that are both useful and beautiful. We focus on precision and expertise. This ensures our solutions meet the highest standards.

Key Takeaways

  • We provide seamless pocket door systems that enhance the aesthetic and functional value of a space
  • Our expertise in engineering large cabinet doors is rooted in our company mission to bridge architectural vision with manufacturing reality
  • We leverage advanced door mechanisms and track systems to deliver high-end custom cabinetry manufacturing solutions
  • Our team is dedicated to providing innovative pocket door systems that are both functional and visually appealing
  • We focus on precision and expertise to ensure that our solutions meet the highest industry standards for pocket door systems and door mechanisms
  • Our solutions utilize advanced track systems to ensure smooth operation and durability

Understanding Modern Pocket Door Systems

Exploring modern pocket door systems is key. We look at what makes them work well and look good. We focus on weight support, space requirements, and hardware selection. This helps us understand how to design and install them.

These systems are popular in modern homes. They hide big cabinet doors neatly. New technology has made them better, fitting many design styles.

  • Enhanced aesthetic appeal
  • Increased storage capacity
  • Improved functionality

New hardware selection options are available. This lets designers and builders make custom pocket door systems. They meet specific weight support and space requirements.

Understanding these factors is crucial. It helps create pocket door systems that look good and work well. By focusing on weight support, space requirements, and hardware selection, we can innovate and improve.

FactorConsideration
Weight SupportCalculating the weight of the door and surrounding structure
Space RequirementsMeasuring the available space for the pocket door system
Hardware SelectionChoosing the appropriate hardware to support the door’s weight and ensure smooth operation

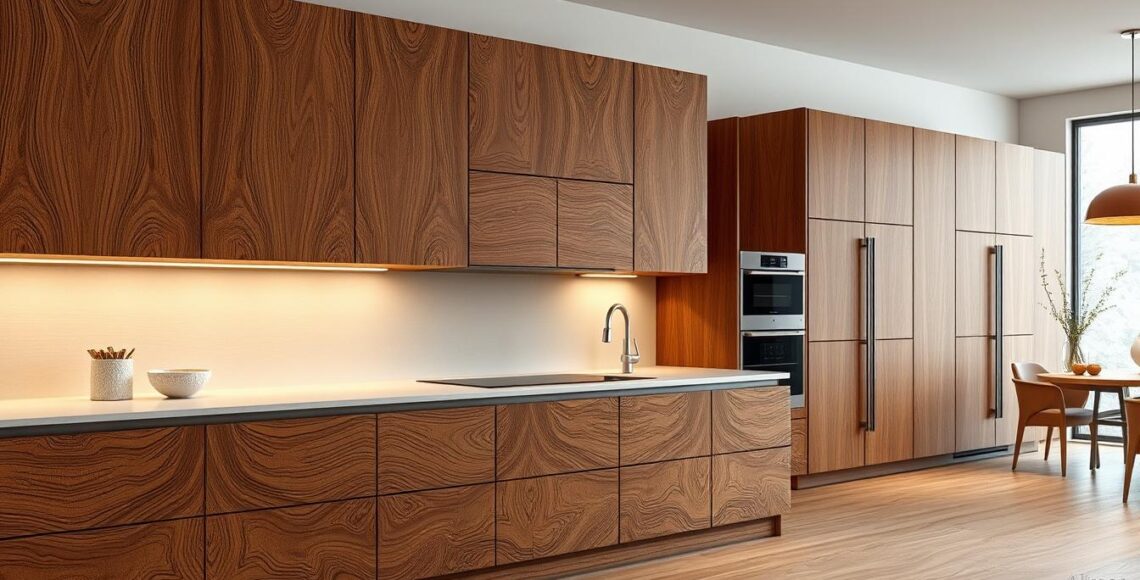
Essential Components for Large Cabinet Installations

We know how important it is to pick the right parts for large cabinet setups. Door mechanisms and guide systems are key. They need careful thought to ensure the installation works well, lasts long, and is safe.

When designing and installing big cabinet doors, consider a few things:

  • Load-bearing capacity
  • Material selection
  • Structural support requirements

Choosing the right door mechanisms and guide systems

We aim to give a clear look at what’s needed for big cabinet setups. This way, our audience can make smart choices. Together, we can make sure the design and the real thing match up, creating top-notch custom cabinets.

ComponentDescription
Door MechanismsResponsible for the smooth operation of the cabinet door
Guide SystemsProvide support and stability to the cabinet door

Weight Capacity and Support Mechanisms

When we design and install pocket door systems, we must think about the weight they can handle. We aim to provide a full understanding of how to support the weight of the doors. This ensures the system works smoothly and safely.

We do detailed calculations to figure out how much weight the doors can handle. We look at the size and material of the doors, and the strength of the walls and floor. This helps us plan the best support for each installation.

Load-Bearing Calculations

To make sure the pocket door system can handle the door weight, we do exact calculations. We check the door weight, hinge and track types, and the wall and floor strength.

Structural Support Requirements

We also think about the structural needs of the pocket door system. We look at the wall and floor types and any extra support needed. This ensures the system can handle the door weight.

Material Selection Guidelines

When picking materials for the pocket door system, we focus on weight support and smooth operation. We choose materials that are strong and quiet. This makes the system reliable and efficient.

By following these steps and considering each installation’s needs, we make sure our pocket door systems work well. They meet our clients’ requirements efficiently and reliably.

FactorConsideration
Load-Bearing CalculationsPrecise calculations to ensure weight support
Structural Support RequirementsEvaluation of walls and floor to ensure stability
Material Selection GuidelinesChoosing durable materials for weight support and clearance planning

Track Systems and Hardware Selection

When designing and installing pocket door systems, track systems are key. They ensure smooth operation and durability. The right hardware selection greatly affects the system’s performance and life span. We’ll look at what to consider for the best track systems and hardware for your pocket doors.

Tracks should handle the door’s weight and size well, offering quiet and smooth movement. Hardware selection depends on the door’s material, size, and weight, and its use. Choosing the right track systems and hardware ensures a reliable and efficient pocket door system that fits your needs.

For the best results, it’s important to know the different track systems and hardware. Each has its own benefits and drawbacks. Understanding these options helps you make smart choices for your pocket door system. Whether you’re an architect or contractor, picking the right track systems and hardware is crucial for a high-quality pocket door system that meets your clients’ needs.

Space Planning and Clearance Requirements

When designing pocket door systems, it’s key to think about space and clearance. We need to look at the minimum space needed, how the door will stack, and where it will be accessed. This ensures the door works well in the room.

The size of the door and the walls and floor matter for the minimum space. Clearance planning is also important to avoid any problems with the door’s movement. By checking these things, we make sure the pocket door fits right and works as it should.

  • Evaluate the minimum cavity dimensions required for the pocket door system
  • Calculate the door stack to ensure proper clearance and movement
  • Consider access point locations and potential obstacles

By taking these steps, we can create a pocket door system that’s both functional and efficient. It will meet the needs of architects and contractors.

FactorConsideration
Minimum Cavity DimensionsDepends on door size and type, surrounding wall and floor conditions
Door Stack CalculationsEnsures proper clearance and movement
Access Point ConsiderationsLocations and potential obstacles

Movement Control and Soft-Close Integration

We know how key movement control is in pocket door systems. It greatly affects how users feel about the doors. Guide systems help make door movement smooth and quiet. This is very important in making high-end custom cabinets.

When we design and install pocket door systems, we focus on movement control and guide systems. We look at the type of guide systems, like soft-close mechanisms, and how they affect the door’s movement. This helps us make pocket door systems that are top-notch in quality and performance.

  • Choose guide systems that are compatible with the door’s weight and size
  • Ensure proper installation and adjustment of the guide systems
  • Consider the use of soft-close mechanisms for enhanced user experience

By following these steps and focusing on movement control and guide systems, we make pocket door systems that work well and feel great to use. Our skills in custom cabinetry help us turn design ideas into real, high-quality solutions. We meet our clients’ unique needs with precision and care.

Professional Installation Guidelines

Installing pocket door systems needs careful attention to ensure they work well. We focus on the door mechanisms and track systems, which are key. They make the system run smoothly.

To install correctly, you’ll need a level, drill, and screwdriver. We suggest a step-by-step guide for accurate and secure setup. This ensures the door and track system are placed right.

Tool Requirements

  • Level
  • Drill
  • Screwdriver

Quality checks are also important. They help make sure everything is aligned and working right. This includes checking the door moves smoothly and the track is securely attached.

Step-by-Step Process

  1. Clear the area of any debris or obstacles
  2. Follow the manufacturer’s instructions to assemble the track system
  3. Install the door mechanisms, making sure they’re aligned and fastened securely

By following these guidelines and focusing on door mechanisms and track systems, we can have a successful pocket door system installation. It will be trouble-free.

Troubleshooting Common Installation Challenges

Installing pocket door systems can sometimes be tricky. We often face common problems that slow us down. It’s key to think about weight support and space requirements to avoid these issues. Planning and preparation can greatly reduce the chance of problems during installation.

Some common challenges include:

  • Insufficient weight support, leading to door sag or collapse
  • Inadequate space requirements, resulting in poor clearance or door binding
  • Incorrect track alignment, causing door misalignment or uneven movement

To solve these problems, we suggest the following steps:

  1. Make sure the track system can handle the door’s weight
  2. Check if there’s enough space for the door and around it
  3. Look at the track alignment and fix it if it’s off

By taking these steps and focusing on weight support and space, we can fix common installation issues. This way, we can make sure the pocket door system is installed right.

ChallengeCauseSolution
Door sag or collapseInsufficient weight supportVerify weight support capacity and adjust as necessary
Poor clearance or door bindingInadequate space requirementsCheck space requirements and adjust as necessary
Door misalignment or uneven movementIncorrect track alignmentInspect and adjust track alignment as necessary

Maintenance and Long-Term Performance

Regular maintenance is key for pocket door systems to work well. We suggest checking the system every six months. This helps catch problems early.

Look for wear on the hardware selection and make sure the movement control works smoothly.

Lubricating the moving parts is also important. It reduces friction and protects the system. Use a good lubricant for door systems and follow the instructions.

Regular Inspection Protocols

  • Check the track system for alignment and damage
  • Inspect the rollers and hinges for wear and tear
  • Verify that the door is properly balanced and aligned

Regular maintenance keeps your pocket door system running well. It’s about choosing the right hardware selection and ensuring good movement control.

Component Replacement Guidelines

If you need to replace a part, follow the manufacturer’s advice. This ensures the new part fits and is installed right.

Custom Solutions for Unique Specifications

We know every project is different. That’s why we create custom pocket door systems. Our team works with architects and contractors to design and install systems that fit each project’s needs.

When we talk about custom solutions, there are a few things to think about. These include the door mechanisms and guide systems, as well as the materials and finishes. We use specific terms to make sure our solutions match each project’s needs. For example, we can add soft-close technology to door mechanisms or design guide systems for heavy use.

Custom solutions offer many benefits. They include more flexibility, better performance, and a nicer look. They also work well with other building systems.

  • Increased flexibility and adaptability
  • Improved performance and reliability
  • Enhanced aesthetic appeal
  • Better integration with other building systems

We design our custom solutions with each project’s unique needs in mind. We consider door size, weight, and material. Our team works closely with clients to create solutions that meet their needs and exceed their expectations.

Choosing custom solutions means pocket door systems are made just for your project. This leads to better performance, more efficiency, and a nicer look. Our team is committed to providing top-quality custom solutions.

Custom SolutionBenefitsConsiderations
Custom door mechanismsImproved performance, increased flexibilityDoor size, weight, material
Custom guide systemsEnhanced aesthetic appeal, better integrationDoor type, building system, material

Future Trends in Pocket Door Technology

Looking ahead, pocket door tech will see big changes. We’ll see more smart features, new materials, and focus on being green. We aim to cover these trends and how they’ll shape the industry.

When picking track systems and hardware, we must think about the future. We need to make sure the tracks can handle the weight. And the hardware must work well with the new materials and tech.

Some new trends in pocket door tech include:

  • Smart features like doors that open and close on their own
  • New materials like glass or metal for sleek doors
  • Doors that save energy and use eco-friendly materials

By using these trends, we can make doors that are not just useful but also look good and are kind to the planet. Keeping up with new tech in tracks and hardware is key. This way, our designs will meet the needs of today’s builders and architects.

Conclusion

As we wrap up this guide on pocket door systems, it’s clear they’re a game-changer. They let architects and contractors make modern cabinets even better. By using pocket door mechanisms, big cabinet doors can vanish, making any room look cleaner and more open.

We’ve looked at the key parts, weight limits, track systems, and how to install them right. Knowing these pocket door systems and following the best practices helps designers add these cool features to their projects. This way, they can make spaces look amazing.

The need for custom and space-saving cabinets is on the rise. The future of pocket door technology looks bright, with new smart features and eco-friendly materials. By keeping up with these trends, designers can make sure their work stays ahead of the curve and meets their clients’ needs.

FAQ

What are the essential components for large cabinet installations using pocket door systems?

For large cabinet installations, you need door mechanisms and guide systems. These parts are key for smooth operation, durability, and safety.

How do I calculate the weight capacity and support requirements for a pocket door system?

To figure out the weight capacity, you need to do load-bearing calculations. You also have to consider structural support and material selection. This ensures the system can handle the weight of the cabinet doors safely.

What are the key considerations for track systems and hardware selection in pocket door systems?

When choosing track systems and hardware, consider the types available. Look at their advantages and disadvantages. Make sure they meet your installation’s specific needs.

How do I ensure proper space planning and clearance for a pocket door system?

For proper space planning, think about the minimum cavity dimensions and door stack calculations. Also, consider access points. This ensures the system fits well in the space.

What are the guidelines for professional installation of pocket door systems?

For professional installation, know the tools you need and follow a step-by-step process. Also, make sure to check the quality of the installation. This ensures the system works smoothly.

How can I troubleshoot common installation challenges with pocket door systems?

To solve common installation problems, focus on weight support and space requirements. This helps ensure a smooth installation process.

What are the key maintenance and long-term performance considerations for pocket door systems?

For long-term performance, regularly inspect the system and lubricate it as needed. Also, know when to replace components. Focus on the hardware and how it moves.

How can I customize pocket door solutions for unique specifications?

To customize pocket door solutions, explore different options. Look at their advantages and disadvantages. Focus on door mechanisms and guide systems.

What are the future trends in pocket door technology?

Future trends include smart integration, new materials, and sustainability. These advancements focus on track systems and hardware selection.

charging station integration

Smart Storage: Integrating Charging Stations in Custom Cabinetry

We know how important it is to mix style and usefulness in custom cabinets. This is especially true for charging stations and managing power. As experts, we team up with architects and contractors to create top-notch cabinets. We make sure they fit each client’s needs, including storing devices.

More devices mean we need smart storage more than ever. Our team is all about giving great advice and solutions. We focus on making charging stations, managing power, and storing devices better.

By adding charging stations to cabinets, we make spaces that are both useful and look good. We aim to offer solutions that are both beautiful and practical. This way, our cabinets are of the highest quality and design.

Introduction to Smart Storage

Our custom cabinet approach is all about teamwork and tackling challenges together. We provide clear, useful writing and examples. We steer clear of hard-to-understand language and focus on terms that matter to our industry.

Key Takeaways

  • Charging station integration is a key aspect of smart storage solutions
  • Power management is crucial in custom cabinetry design
  • Device storage solutions should be functional and aesthetically pleasing
  • Our team of experts works closely with architects and contractors to design and manufacture high-end custom cabinetry
  • We focus on balancing form and function in our custom cabinetry designs
  • Our goal is to provide expert solutions that meet the unique needs of each client

Understanding Modern Charging Station Integration Needs

We understand the need to keep up with changing device charging needs. Wireless charging and fast charging have changed how we make custom cabinets. Electrical integration is key in our work, helping us make smart storage that fits new charging tech.

Our focus on cable management aims for a smooth and tidy charging experience. We use wire concealment in our designs to keep things neat. This makes the space look better and work better too. It shows our dedication to quality custom cabinets that fit our clients’ needs.

Important things to think about for modern charging stations include:

  • Device compatibility: Making sure our stations work with many devices, from phones to laptops.
  • Power requirements: Giving enough power for fast charging and other high-energy devices.
  • Aesthetics: Creating stations that look good and fit in with the area, reducing visual clutter.

By focusing on electrical integration, cable management, and wire concealment, we aim to exceed our clients’ expectations. We want to offer a complete solution for charging station integration. It’s about finding the right balance between looks and function for a great user experience.

Essential Components for Custom Cabinetry Power Solutions

When we design custom cabinetry with charging stations, we focus on key parts for safe and efficient power. We pick the best power supply, place outlets wisely, and use good heat dissipation methods. Our experts will help you choose the right parts for your power solutions.

A good power supply is key for charging well. We look at how much power your devices need and pick a supply that fits. Also, where you put outlets matters for safety and ease. We suggest outlets near countertops or in drawers.

Good heat dissipation stops overheating and keeps your devices working long. We use materials and designs that let air flow and cool down. With these parts, your custom cabinetry power solution will be both useful and safe.

  • Power supply capacity and efficiency
  • Outlet placement and accessibility
  • Heat dissipation and ventilation

By thinking about these points, you can make a custom cabinetry power solution that fits your needs. It will charge your devices safely and efficiently.

Planning Your Charging Station Layout

When designing a charging station, think about what your devices need and the space you have. Good device storage and cable management make it both useful and nice to look at. First, figure out what devices you’ll charge, measure your space, and plan where outlets should go.

A good layout considers how many devices you’ll charge and their power needs. This means looking at the ampere and voltage of your devices. This way, your charging station will work well and safely, keeping everything cool and safe from electrical dangers.

  • Assess your device requirements and categorize them by power consumption and charging frequency.
  • Measure the available space in your custom cabinetry and determine the optimal layout for your charging station.
  • Determine the optimal outlet placement and power management configuration to ensure safe and efficient charging.

By following these steps and thinking about your needs, you can make a charging station that fits your space and needs. It will have good device storage, cable management, and power management.

Professional Power Management Strategies

In the world of custom cabinetry, managing power is key. It ensures charging stations work safely and efficiently. Our team focuses on power management to avoid overheating, cut down energy use, and boost system reliability.

For electrical integration, we look at cable length, wire size, and connector types. This ensures smooth connections and less signal loss. We plan the electrical setup to make charging stations both useful and stylish, with wire concealment to keep things neat.

  • First, check what devices you need to power and what electrical setup you need.
  • Use cable ties or conduit systems for wire concealment to keep things tidy.
  • Always check and maintain your charging station to avoid overheating and damage.

By using these strategies, architects and contractors can make top-notch custom cabinetry. It meets and goes beyond client expectations, offering a safe, efficient, and reliable charging experience.

Design Considerations for Seamless Integration

When we design custom cabinetry with charging stations, we think about looks and function. A good charging station should look good with the cabinetry and work well. We aim for aesthetic compatibility, making sure the charging station fits with the rest.

Choosing the right materials is key. They should look good, last long, and be easy to clean. This is important for device storage, so the station can handle daily use.

We also think about cable management and outlet placement. A good cable system keeps things tidy, and placing outlets right makes charging easy and safe. This way, we make a charging station that looks good and works well.

Aesthetic Compatibility

To match the cabinetry, we offer many finishes and styles. This helps the charging station blend in perfectly.

Material Selection

We pick materials that are tough, easy to care for, and look great. We look at things like how well they handle moisture and scratches. This ensures the station can handle daily life.

Finish Options and Durability

We have many finishes to match the cabinetry. We also make sure the finish is durable for daily use. By focusing on these, we create a charging station that’s both useful and nice to look at, with an eye on device storage and cable management.

Effective Cable Management Techniques

When designing custom cabinetry with charging stations, cable management is key. It keeps your space tidy and functional. We suggest using smart ways to hide wires and organize cables for a safe and efficient power supply.

Here are some methods to consider:

  • Route cables through channels or conduits to hide them
  • Use cable ties or clips to keep wires tidy and untangled
  • Install access points wisely to shorten cables and make them easier to manage

By using these wire concealment and cable management tips, you can design a custom cabinetry that fits your needs. It will also provide a reliable power supply.

Focus on cable management and wire concealment to create a safe, efficient, and stylish charging station. It will enhance your custom cabinetry design.

Cable Management TechniqueDescription
ChannelingRouting cables through designated channels or conduits
Cable TiesSecuring wires with cable ties or clips to prevent tangles
Access Point PlanningStrategically installing access points to reduce cable length

Heat Dissipation and Ventilation Requirements

When we design custom cabinetry with charging stations, we focus on heat dissipation and ventilation. It’s key to prevent overheating. Overheating can harm device performance, cause damage, or be unsafe. We make sure our charging stations work well and safely by managing power and integrating electricity.

Some important things to think about for heat dissipation and ventilation are:

  • Adequate airflow around devices to prevent heat buildup
  • Use of materials with high thermal conductivity to facilitate heat transfer
  • Implementation of ventilation systems, such as fans or vents, to remove excess heat

We aim to make custom cabinetry that goes beyond what our clients expect. We focus on performance, safety, and looks. Our goal is to mix architectural dreams with real-world manufacturing, paying close attention to heat dissipation and ventilation.

Our method for handling heat dissipation and ventilation is practical. We work with architects and contractors to meet each project’s unique needs. We follow industry standards for power management and electrical integration.

We plan carefully and pay attention to details to make charging stations that work well and look good. They fit right in with any space. Our dedication to quality in design, construction, and function has made us a reliable partner for high-end custom cabinetry.

Smart Device Storage Solutions

Integrating charging stations into our custom cabinetry is key. We need to focus on smart device storage solutions. These should be both functional and stylish, fitting our needs and enhancing our cabinetry.

Effective device storage keeps our space tidy. It’s linked to managing cables and power. This ensures a smooth charging experience.

Designing smart storage means creating systems that work well and can change. Drawer organization systems are great for storing devices and keeping them charged. Adding cable management features makes charging seamless and efficient.

Drawer Organization Systems

Drawer systems are perfect for maximizing storage while keeping things neat. They can be tailored to fit our devices. With power outlets and cable management, we get a full charging station.

Vertical Storage Options

Vertical storage is another smart choice. Wall-mounted shelves or cabinets save space and keep devices organized. They also let us add cable management features for a tidy look.

Smart device storage solutions make our cabinetry both useful and beautiful. By combining storage, cable management, and power, we create a top-notch charging station. It meets our needs and improves our experience.

Safety Considerations and Electrical Compliance

When designing custom cabinetry, safety and electrical rules are key, especially with charging stations. We focus on electrical integration, power management, and hiding wires. It’s vital to keep safety first to make sure our charging stations work well and safely.

Following electrical codes like the National Electric Code (NEC) and local laws is crucial. This ensures our charging stations are safe. Good power management stops overheating, shocks, and fires. Using fuses and circuit breakers helps by cutting off power in emergencies.

Key Safety Considerations

  • Compliance with national and local electrical codes
  • Proper wire concealment to prevent electrical shocks and fires
  • Installation of circuit protection devices, such as fuses and circuit breakers
  • Regular maintenance and inspection of electrical systems

By focusing on safety and following electrical rules, we can make custom cabinetry that impresses our clients. As experts, we need to keep up with new electrical trends. This ensures our charging stations are safe, efficient, and dependable.

Maintenance and Accessibility Features

When we design custom cabinetry with charging stations, we focus on maintenance and accessibility. A good charging station should be easy to keep clean and simple to use. We add features like easy-to-clean surfaces, device storage that’s easy to reach, and cable management systems that keep things organized.

For the charging station to last, we pay close attention to the power supply and its parts. We choose top-quality materials and design the system to work well and reliably. This way, we make a charging station that works well and is easy to take care of.

  • Easy-to-access components for simple maintenance and repair
  • Organized cable management systems to reduce clutter and improve safety
  • Durable and easy-to-clean materials for the charging station’s surface

We aim to make a charging station that’s not just useful but also easy to care for and accessible. Our focus on detail and quality ensures our custom cabinetry meets the highest standards.

Future-Proofing Your Charging Station Integration

Technology keeps changing, and we need to think about our charging station’s future. We must plan how our power systems will grow with new tech. Making sure our charging stations work well and safely is key.

Looking ahead, we should pick designs that can grow with us. Modular systems are great because they let us add new stuff easily. Also, hiding wires keeps things neat and safe.

Some important things to think about for the future include:

  • Looking at what power management we need now and planning for more later
  • Picking electrical solutions that can grow and change with us
  • Using good wire hiding to keep things safe and tidy

By thinking ahead and planning, we can make charging stations that are smart, safe, and ready for new tech. This way, we can keep up with changes and meet our growing needs.

Conclusion: Transforming Your Space with Smart Charging Solutions

Adding charging stations to custom cabinetry can change your living or office space. It makes your space more efficient and meets today’s needs. This is thanks to smart charging solutions, power management, and clever storage.

Our team is all about making top-notch custom cabinetry that fits the latest charging tech. We get the challenges architects and contractors face. We aim to make your vision a reality, solving power and storage issues.

Whether you’re starting from scratch or updating an old space, our smart charging solutions can help. We’ll turn your space into a beautiful and useful place. Contact us to see how we can help you create the perfect custom cabinetry for your needs.

FAQ

What are the essential components for custom cabinetry power solutions?

When creating custom cabinetry with charging stations, key components are vital. You need the right power supply and smart outlet placement. Also, effective heat dissipation is crucial for safe and efficient power delivery.

How do I plan the layout of my charging station?

Planning your charging station’s layout is key. First, figure out what devices you’ll charge. Then, measure the space and decide where outlets should go. This ensures your station meets your needs and fits your cabinetry.

What are the professional power management strategies for custom cabinetry?

Effective power management is vital for your charging station’s safety and efficiency. Our experts will guide you on choosing the best power supply and hiding wires. These strategies are tailored for custom cabinetry makers.

What design considerations are important for seamless integration?

Designing your cabinetry with charging stations requires careful thought. You must balance looks and function. Choose materials and finishes that look good and last long.

How can I effectively manage cables in my custom cabinetry?

Cable management is crucial in custom cabinetry, especially with charging stations. We offer tips on hiding wires, organizing cables, and planning access points. These methods keep your space tidy and functional.

What are the heat dissipation and ventilation requirements for charging stations?

Heat dissipation and ventilation are essential for charging stations in custom cabinetry. We’ll discuss the needs for keeping your station cool. You’ll get practical advice on how to manage heat and air flow.

What are the safety considerations and electrical compliance requirements for custom cabinetry?

Safety and electrical compliance are top priorities in custom cabinetry, especially with charging stations. We’ll cover code rules, circuit safety, and installation guidelines. This ensures your station is safe and works well.

How can I future-proof my charging station integration?

As tech advances, it’s important to make your charging station adaptable. We’ll talk about making your station expandable and upgradeable. Plus, we’ll explore smart home integration options for a future-proof solution.

millwork seams

Perfect Seams: Joining Techniques for Large-Scale Millwork

Getting perfect seams is key for a project’s look and strength, especially in big millwork jobs. We focus on the best ways to join large-scale millwork. It’s all about being precise and skilled in making seams and joints.

Our aim is to mix architectural dreams with real-world making. We want every seam to show our dedication to quality. This includes choosing the right places for seams.

In the world of big millwork, seams can really make or break a project. By getting good at designing joints and placing seams, we can make smooth transitions. Our team works hard to offer top-notch custom cabinetry. We meet the special needs of architects and contractors.

Key Takeaways

  • Perfect seams are essential for the aesthetic and structural integrity of large-scale millwork projects
  • Precision and expertise are critical in achieving high-quality millwork seams
  • Joint design and seam placement are crucial aspects of large-scale millwork
  • Strategic seam placement can enhance the overall quality of a project
  • Mastering the art of millwork seams requires a deep understanding of joint design and seam placement principles
  • Our team is committed to providing high-end custom cabinetry manufacturing solutions that meet the unique needs of architects and contractors
  • By bridging architectural vision with manufacturing reality, we can create seamless transitions that elevate the overall quality of a project

Understanding Millwork Seams and Their Importance

Millwork seams are key to a project’s quality and look. They involve material expansion, connection methods, and visual continuity. These factors are crucial for success.

Millwork seams are more than just wood joints. They need careful thought about materials, environment, and look. Knowing these, we can tackle common issues and get perfect seams.

Definition and Basic Principles

A millwork seam connects millwork pieces like cabinets or shelves. It aims for strength, durability, and beauty. The choice of connection method, like mortise and tenon, affects the seam’s quality.

Impact on Project Quality

A good millwork seam can make a project shine. But a bad one can ruin it. Keeping the seam stable over time is vital. This ensures the project looks and works well.

Common Challenges in Large-Scale Projects

In big projects, material expansion and connection methods are big hurdles. But, with the right strategies, we can get perfect seams. This boosts the project’s quality and look.

Essential Tools and Materials for Joint Creation

Creating perfect seams needs the right tools and materials. Specialized saws, drills, adhesives, and fasteners are key. The quality of the seam greatly depends on these choices. For structural joints like mortise and tenon or dovetail, specific tools and methods are needed for strength and durability.

Our team stresses the importance of assembly techniques like glue-up or mechanical fastening. The right tools and materials help architects and contractors make seams that work well and look good. Some must-haves for joint creation are:

  • Specialized saws and drills
  • High-quality adhesives and fasteners
  • Clamps and presses for glue-up and mechanical fastening

Investing in the right tools and materials, and learning various assembly techniques, helps us make top-notch structural joints. These are crucial for big millwork projects.

Strategic Seam Placement in Large-Scale Projects

In big millwork projects, where looks and function matter, where seams are placed is key. We look at the design, materials, and structure to find the best spots for joints. This planning helps keep the project’s look smooth and uninterrupted.

It’s also important to think about how materials might expand or shrink. This affects the project’s strength. We design joints that can move with these changes, making the finish last longer. Good joint design is vital for this.

To get perfect seams, we think about a few things:

  • Material selection and compatibility
  • Structural requirements and load-bearing capacity
  • Visual flow and aesthetic appeal

By planning seam placement well, we make top-notch, custom millwork. This meets what architects and contractors need.

FactorConsideration
Material selectionCompatibility, durability, and expansion control
Structural requirementsLoad-bearing capacity, joint design, and seam placement
Visual flowAesthetic appeal, seam visibility, and overall project design

Advanced Joint Design Techniques

Exploring millwork seams reveals the importance of joint design. It greatly affects the quality and look of the final product. By learning advanced joint design methods, architects and contractors can make unique, eye-catching millwork seams.

When designing joints, material expansion is a key consideration. Different materials expand and contract at different rates. This can affect the seam’s look and durability over time. By designing joints with material expansion in mind, we ensure they last longer and look better.

Using the right assembly techniques is also crucial for quality millwork seams. This involves using special tools and understanding the materials. By combining advanced joint design with skilled assembly techniques, we achieve seams that are both beautiful and functional.

  • Improved durability and longevity
  • Enhanced aesthetic appeal
  • Increased design flexibility

Investing in advanced joint design and assembly techniques helps architects and contractors. They can create millwork seams that impress clients and stand out from others.

Material Expansion and Environmental Factors

Material expansion is key when we talk about millwork seams. It’s how materials change with temperature and humidity. This can really affect the look and quality of our work.

When we build millwork, we think about how to join parts together. Different materials expand differently. For example, wood and metal grow at different rates. So, we need the right ways to connect them for a strong and lasting joint.

Some important things to think about include:

  • How temperature affects different materials
  • How humidity impacts them
  • Planning for seasonal changes

By knowing these things and choosing the right connection methods, we can keep our millwork seams tight and secure. This way, our work will last longer and look better.

Professional Methods for Seamless Connections

We know how key seamless connections are in millwork seams. That’s why we use many connection methods. From special connectors to advanced adhesives, the right choice makes a big difference in how the seam looks and works.

Keeping the look smooth is also vital. Visual continuity can make or break a project’s look. By picking the right connection methods, we can make sure the seams are both functional and beautiful.

Structural joints are key for seamless connections. They must handle loads and stresses well. At the same time, they should blend smoothly with other parts.

Here are some tips for seamless connections with different methods:

  • Choose top-notch materials and connectors for a strong bond
  • Think about the project’s needs and design the joints right
  • Advanced adhesives can make joints almost invisible

By using these tips and the right methods, we can achieve seamless connections. These connections meet the highest standards of quality and beauty.

Connection MethodAdvantagesDisadvantages
Specialized connectorsHigh strength and durabilityHigh cost
Advanced adhesive systemsInvisible joint, high strengthRequires specialized skills and equipment

Quality Control and Inspection Protocols

Quality control and inspection protocols are key in millwork manufacturing. They ensure our products are top-notch. We use strict quality control to catch and fix problems early.

We follow a detailed process for quality control. This includes checks before, during, and after installation. This way, we make sure our millwork is flawless and meets our clients’ needs. We stick to inspection protocols to ensure our products meet standards.

Our quality control steps include:

  • Checking measurements and dimensions
  • Examining material and work quality
  • Following industry standards and laws

By combining these steps with assembly techniques, we create millwork that impresses our clients.

Our focus on quality control and inspection helps turn architectural dreams into reality. We give our clients millwork that meets their exact needs.

Quality Control StageDescription
Pre-Installation ChecksVerification of measurements, materials, and specifications
During-Installation VerificationInspection of workmanship and compliance with standards
Post-Installation AssessmentFinal evaluation of product quality and performance

Troubleshooting Common Seam Issues

Even small problems with millwork seams can ruin a whole project. Knowing what causes common issues helps architects and contractors fix them. Seam placement is key, as wrong placement can cause uneven seams and structural problems.

Material expansion is another big issue, leading to loose or uneven seams. To fix this, think about the material’s properties and use the right connection methods. Mixing old-school skills with new tech can solve these problems.

Here are some common seam issues and how to solve them:

  • Uneven seams: Check the seam placement and adjust as needed
  • Loose connections: Use appropriate connection methods and consider material expansion
  • Structural issues: Ensure proper seam placement and material selection

Acting fast to fix seam problems ensures millwork projects are top-notch.

Conclusion: Mastering Perfect Millwork Seams

Mastering millwork seams is all about understanding joint design, where to place seams, and how the environment affects them. By using the tips from this article, architects and contractors can improve their large-scale millwork projects. This ensures smooth connections that look good and work well.

At our company, we aim to make architectural dreams come true with precision and skill. Our experienced team creates new solutions for custom cabinetry and millwork. We’re proud to turn ambitious designs into real things, with each seam showing our dedication to quality.

When you start your next big millwork project, use what you’ve learned here. Perfecting millwork seams will make your work better and impress your clients and peers. Let’s work together to set a high standard in custom millwork.

FAQ

What are the basic principles of millwork seams?

Millwork seams connect pieces like cabinets and shelves. Knowing about them is key for architects and contractors. It affects the project’s look and quality.

How do millwork seams impact the quality of a project?

Millwork seams are very important. They can make a project look good or bad. Issues like material changes and connection types can affect this.

What are the essential tools and materials for creating perfect millwork seams?

You need the right tools and materials for perfect seams. This includes special saws and adhesives. Tools like mortise and tenon joints need specific tools and skills.

How do I determine the optimal locations for millwork seams?

Where you place seams matters a lot. It affects the project’s look and strength. You need to think about the design and materials used.

What are some advanced joint design techniques for millwork seams?

Advanced techniques can make seams look better. This includes complex joints that need special skills. You also have to think about how materials change over time.

How do environmental factors affect millwork seams?

The environment can change how seams look. Things like temperature and humidity matter. You need to plan for these changes when building millwork.

What are the professional methods for creating seamless millwork connections?

Professionals use special methods for seamless connections. This includes using certain connectors and adhesives. It’s all about making the seams look good.

How can I ensure quality control and inspection protocols for millwork seams?

Checking seams is important for quality. You should check before, during, and after installation. This ensures they meet high standards.

How can I troubleshoot common seam issues?

Knowing how to fix common seam problems is key. Issues like uneven seams can be fixed by understanding the cause. This helps avoid bigger problems later.

wine room cabinetry

Temperature Control: Wine Room Cabinetry Engineering Guide

We create top-notch custom cabinetry, focusing on wine room needs. We know how vital temperature control is. It keeps wine quality and flavor intact.

Our skills in wine room cabinetry and climate control help us offer custom solutions. We balance temperature, humidity, and air to create the best wine storage. Our aim is to guide you on temperature control in wine room cabinetry, covering climate control and fine woodworking.

In the world of wine room cabinetry, temperature control is key. It ensures wine ages well. Our method combines fine woodworking with climate science knowledge. This way, we craft unique solutions that stand out.

Key Takeaways

  • Temperature control is essential for preserving the quality and flavor of wine in wine room cabinetry.
  • Climate control is critical for maintaining a consistent environment in wine storage environments.
  • Effective temperature control requires a deep understanding of climate science and fine woodworking.
  • Wine room cabinetry must balance temperature, humidity, and air circulation to create an optimal environment.
  • Our expertise in wine room cabinetry and climate control enables us to provide tailored solutions for wine enthusiasts.
  • Temperature control is a critical component of climate control in wine room cabinetry.
  • Our approach to wine room cabinetry combines expertise in fine woodworking with a deep understanding of climate science.

Understanding Wine Room Cabinetry Fundamentals

When designing wine storage systems, we focus on key components for wine preservation. We aim to create custom solutions that are both functional and beautiful. Our designs meet the unique needs of each client, balancing form and function.

We carefully choose materials for our wine room cabinetry. We consider durability, sustainability, and how they look. This ensures our wine storage systems are not just practical but also visually appealing.

The structure of wine storage systems is vital for their performance and longevity. We pay attention to the frame, ventilation, and climate control. This attention to detail helps us create spaces that preserve wine quality and offer a beautiful place for wine lovers to enjoy.

Core Components of Wine Storage Systems

Insulation, climate control, and humidity management are key components. These elements work together to create the perfect environment for wine. We select materials and design systems that meet these needs, protecting wine collections for years.

Material Selection Criteria

Choosing the right materials is crucial for wine room cabinetry. We consider the type of wood, metal, or glass, as well as the finish and texture. Our goal is to create a space that looks great and works well, enhancing the wine storage experience.

Structural Requirements

A strong frame and good ventilation are essential. Our team designs and builds wine rooms with these in mind. This ensures the space is functional, durable, and long-lasting, meeting each client’s unique needs.

Understanding the core components, material selection, and structural requirements helps us create custom wine room cabinetry. Our team is dedicated to providing high-quality solutions that protect and preserve wine collections for years to come.

ComponentDescription
InsulationProvides thermal protection and maintains optimal temperature
Climate ControlRegulates temperature and humidity levels to preserve wine quality
Humidity ManagementMaintains optimal humidity levels to prevent wine spoilage

The Science Behind Wine Preservation

Wine preservation is a complex process that involves understanding the science behind wine. We must consider the chemical reactions that happen during wine aging. These include oxidation, reduction, and hydrolysis. These reactions can change the wine’s quality and flavor.

To keep the wine in top shape, it’s key to control its environment. This means keeping the temperature, humidity, and lighting just right. Using climate-controlled wine rooms and special storage cabinets helps a lot. By knowing the science behind wine and managing the storage, we can preserve the wine’s quality and taste.

  • Temperature control: maintaining a consistent temperature between 45°F and 65°F
  • Humidity control: maintaining a relative humidity of 50-70%
  • Lighting control: minimizing exposure to direct sunlight and using low-intensity lighting

By thinking about these factors and understanding the science behind wine, we can design wine room cabinetry. It’s made to keep the wine’s quality and flavor. This needs a deep grasp of the chemical reactions in wine aging and the importance of controlling the storage environment.

Essential Climate Control Components

Wine room cabinetry needs climate control to keep wine at its best. A good climate control system is key for wine quality and taste. We’ll look at the main parts of climate control, like temperature, humidity, and air flow.

Keeping the temperature right is crucial to avoid damage to the wine. Cooling, heating, or a mix of both systems can help. A steady temperature of 45°F to 65°F lets wine age well.

Humidity Management Solutions

Managing humidity is also vital. Keeping humidity between 50% and 70% stops mold and mildew. Humidifiers, dehumidifiers, or both can help.

Air Circulation Requirements

Air flow is important for a healthy wine room. It stops mold and mildew by moving air. Fans and vents can help with this.

In short, a good climate control system is key for wine storage. It includes temperature regulation, humidity management, and air flow. These elements help keep wine quality and taste high. As we learn more about wine room cabinetry, we’ll see how climate control affects wine storage.

Advanced Insulation Techniques for Wine Rooms

Creating the perfect environment for wine storage is key. Insulation techniques are vital for this. They help keep the temperature and humidity just right, which is crucial for wine quality and flavor.

We suggest using thermal barriers to block heat and keep the climate stable in wine rooms.

Effective insulation techniques include foam board, fiberglass, and spray foam. These materials can cover walls, ceilings, and floors. They help keep the temperature and humidity steady. Also, vapor barriers stop moisture from getting in and harming the wine.

To boost insulation techniques, consider condensation prevention systems. These systems, like dehumidifiers and ventilation, stop moisture buildup. This makes wine rooms energy-smart and great for keeping wine quality high.

Using advanced insulation techniques in wine rooms has many benefits:

  • Improved temperature and humidity control
  • Increased energy efficiency
  • Enhanced wine preservation
  • Reduced risk of moisture damage

Moisture and Vapor Barrier Implementation

Keeping wine room cabinets dry is key to avoiding damage from humidity. We focus on using a good vapor barrier to maintain our wine storage quality. Understanding moisture management helps us design and install vapor barriers that meet top quality standards.

We look at different vapor barrier materials like plastic sheets, foil-backed foam board, and spray-on coatings. Each has its own benefits and drawbacks. The right material choice depends on the wine room’s specific needs. It’s also important to install these barriers correctly, including sealing and flashing, to make sure they work well.

Vapor Barrier Materials and Installation Methods

  • Plastic sheets: a cost-effective option that provides a reliable barrier against moisture
  • Foil-backed foam board: offers improved insulation and vapor barrier properties
  • Spray-on coatings: a flexible and versatile option that can be applied to various surfaces

Ensuring the vapor barrier is installed right is crucial. We do regular checks and tests to catch any problems. This way, we can be sure our wine room solutions are top-notch and last long.

With good moisture management and vapor barriers, we protect wine room cabinets from humidity damage. This keeps the wine safe and makes wine lovers happy.

Custom Wine Room Cabinetry Design Solutions

Creating a unique wine storage area is key. Custom wine room cabinetry is essential for this. It should reflect the owner’s style and match the room’s architecture.

We focus on style integration, like modern, traditional, and rustic designs. We listen to our clients to make sure the final product meets their dreams. With custom cabinetry, we can make a space that showcases their wine collection in a unique way.

Style Integration Options

  • Modern designs featuring sleek lines and minimalist aesthetics
  • Traditional designs with ornate details and classic finishes
  • Rustic designs incorporating natural materials and distressed finishes

Space Optimization Strategies

To make the most of space, we use vertical, horizontal, and corner storage. This careful planning makes the wine room both beautiful and useful.

Material Selection Guide

Choosing the right materials is key for the wine room’s look and durability. We offer wood, metal, and glass, each with its own benefits. By picking the right materials, we create a wine room that meets our client’s needs, making it a unique and functional space.

MaterialCharacteristicsBenefits
WoodNatural, warm, and traditionalDurable, versatile, and aesthetically pleasing
MetalModern, sleek, and industrialStrong, low-maintenance, and resistant to pests
GlassContemporary, elegant, and transparentVisually striking, easy to clean, and resistant to moisture

Thermal Management Systems Integration

Wine room cabinetry needs good thermal management to keep temperature and humidity steady. We think it’s key to have systems that work well together. This means using cooling, heating, and hybrid systems to control temperature and humidity.

Integrating these systems is vital. It lets them work smoothly together. We use sensors, controllers, and actuators to watch and adjust temperature and humidity. This makes our wine room cabinetry energy-saving and great for keeping wine quality.

Important things to think about for thermal management systems include:

  • Choosing the best cooling systems, like evaporative or refrigeration
  • Designing and setting up heating systems, like radiant floor or forced-air
  • Using hybrid systems for the best temperature control

Understanding thermal management systems integration helps us make wine room cabinetry that fits our clients’ needs. Whether it’s a small cellar or a big storage space, our knowledge lets us offer custom solutions. Each project gets a solution that’s just right.

Professional Installation Requirements

Installing wine room cabinetry needs professional installation for the best results. It’s important to know the site well, including its conditions and limits. This ensures the cabinetry fits perfectly with the space.

Before we start, we prepare the site, deliver materials, and set up equipment. Planning these steps carefully helps avoid problems. It makes the installation process go smoothly.

Key Considerations for Installation

  • Equipment specifications: The right tools and equipment are essential for a successful installation. This includes specialized tools designed specifically for handling and installing wine room cabinetry.
  • Safety protocols: Ensuring the safety of the installation team and the integrity of the cabinetry is paramount. This involves adhering to strict safety protocols and guidelines to prevent accidents and damage.

By focusing on professional installation, equipment specifications, and safety protocols, we ensure our wine room cabinetry is both beautiful and functional. Our commitment to quality makes our installations stand out.

Maintenance and Performance Monitoring

Regular maintenance is key for wine room cabinetry to work well. This means cleaning, checking, and fixing things. Doing these tasks helps keep the wine quality high.

Performance monitoring is also vital. It lets us keep an eye on the wine room’s conditions. We use sensors for temperature, humidity, and more. This way, we can adjust things to keep the wine just right.

Important parts of maintenance and performance monitoring are:

  • Regular cleaning of the wine room and cabinetry
  • Checking the cooling system and other gear
  • Watching temperature and humidity levels
  • Fixing or replacing things when needed

By focusing on maintenance and performance monitoring, we make sure our wine room cabinetry works great. This creates the best space for storing wine.

Troubleshooting Common Climate Issues

Climate problems can really affect how well wine room cabinets work. It’s key to find and fix these issues to keep the wine in top shape. This way, we avoid damage to the wine and keep the storage area in great condition.

Some common problems include temperature changes, humidity issues, and system failures. We can solve these by checking temperature and humidity, looking at insulation and vapor barriers, and keeping the climate control system in good shape.

Solutions for Temperature Fluctuation

Temperature changes can harm wine and lower its quality. To fix this, we use systems that keep the temperature steady. This includes thermostats, heating and cooling units, and insulation to control the temperature.

Humidity Control Problems

Keeping the right humidity is also vital. Too much can cause mold, while too little can dry out corks. We use dehumidifiers, humidifiers, and hygrometers to manage humidity levels.

By using these strategies, we can solve common climate problems in wine rooms. This keeps the wine in perfect condition and makes sure the cabinets work well.

Regular upkeep and checking how things perform are also important. This helps prevent climate issues and keeps the cabinets running smoothly. Together, we can make a reliable and efficient space for wine lovers and collectors.

Environmental Impact and Energy Efficiency

We aim to make the perfect wine storage space. This means thinking about the environment and saving energy. We want to cut down on waste and use less power. This way, we help the planet and make our space better for it.

The materials we choose are key to this goal. Using sustainable options like reclaimed wood, bamboo, and eco-friendly paints helps a lot. For example, reclaimed wood makes beautiful cabinets, and bamboo is a fast-growing, renewable choice.

Sustainable Materials and Energy Conservation Methods

Here are some ways to be green and save energy:

  • Reclaimed wood for wine room cabinetry
  • Bamboo for shelving and other applications
  • Low-VOC paints to reduce indoor air pollution
  • Insulation to reduce heat transfer and energy consumption
  • Climate control systems to maintain optimal temperature and humidity levels

By using these materials and methods, we lessen our impact on the environment. We also save energy with LED lights, which use less power and last longer. These steps help us create a wine storage space that’s good for our wine and the planet.

Conclusion: Creating the Perfect Wine Storage Environment

Creating the perfect wine storage environment is a dream for wine lovers. It involves understanding how to control temperature, humidity, and insulation. This ensures the quality and flavor of fine wines stay intact.

It’s all about finding the right balance. We need precise climate control and beautiful, functional storage solutions. This guide has shown us how to achieve this.

We’ve looked at the key parts of a well-designed wine room. This includes the structure, insulation, and climate control. By choosing the right materials and systems, we can keep the wine storage environment perfect for preserving wine.

Now, we know how to make the perfect wine storage. With the right knowledge and care, our wine room cabinetry can become a special place. Here, every bottle is safe and celebrated in its own way.

FAQ

What are the core components of wine storage systems?

Wine storage systems need insulation, climate control, and humidity management.

What are the material selection criteria for wine room cabinetry?

For wine room cabinetry, materials like wood, metal, or glass are chosen. It’s also important to consider the structure and ventilation.

What are the key factors in maintaining a consistent temperature and humidity level for wine preservation?

Keeping a steady temperature and humidity is key for wine quality. It involves understanding aging science, like oxidation and hydrolysis.

What are the essential climate control components for wine room cabinetry?

Wine room cabinetry needs systems for temperature and humidity control. Air circulation and lighting are also important.

What are the advanced insulation techniques used in wine room cabinetry?

Advanced insulation includes thermal and vapor barriers. These help keep the temperature and humidity steady.

How are moisture and vapor barriers implemented in wine room cabinetry?

Moisture and vapor barriers are crucial. They use materials like plastic sheets and foam board. Proper installation is key.

What are the different custom design solutions available for wine room cabinetry?

Custom designs include various styles and space-saving ideas. Materials are chosen to fit the space and look.

How are thermal management systems integrated into wine room cabinetry?

Thermal systems are vital for temperature control. They include cooling, heating, and hybrid systems. Sensors and controllers are used too.

What are the professional installation requirements for wine room cabinetry?

Professional installation involves site prep and material delivery. Special tools and safety protocols are used.

How is maintenance and performance monitoring conducted for wine room cabinetry?

Maintenance includes cleaning and checking the system. Sensors monitor temperature, humidity, and pressure for efficiency.

How can common climate issues in wine room cabinetry be troubleshot?

Troubleshooting involves fixing temperature and humidity problems. Systems are checked and repaired as needed.

What are the environmental impact and energy efficiency considerations for wine room cabinetry?

Considerations include using sustainable materials and conserving energy. This reduces the area’s carbon footprint and energy use.

acoustic millwork

Sound Solutions: Acoustic Design in Media Room Millwork

We think it’s key to link architectural dreams with real-world making. This is especially true for media rooms. Understanding the role of sound absorption and acoustic panels is vital for top-notch sound.

We aim to help architects and contractors make media rooms better. By using sound absorption and acoustic panels, we can make rooms that sound great and look good too.

Knowing how sound absorption and acoustic panels work is important. It helps us make spaces that look amazing and sound even better. Our skills in acoustic millwork let us mix looks with sound quality, making every media room top-notch.

Key Takeaways

  • Acoustic design is a critical component of media room millwork, requiring careful consideration of sound absorption and acoustic panels.
  • Sound absorption techniques can be used to minimize echo and reverberation, creating a more immersive audio experience.
  • Acoustic panels can be strategically placed to optimize sound quality and reduce distortion.
  • Our expertise in acoustic millwork solutions enables us to balance aesthetic considerations with technical requirements.
  • By working together, we can create media rooms that deliver outstanding audio performance without compromising on design.
  • Our goal is to provide architects and contractors with the knowledge and expertise needed to create high-end custom cabinetry manufacturing solutions.
  • We focus on bridging architectural vision with manufacturing reality through precision and expertise.

Understanding the Basics of Media Room Acoustics

Creating an immersive experience in a media room starts with acoustics. We must understand how sound waves act in closed spaces. This includes common challenges and how room shape affects sound. Knowing these basics helps architects and contractors design better noise control and sound diffusion systems.

Sound waves in closed spaces can bounce off walls and floors. This creates echoes and reverberations that can ruin the listening experience. To fix this, we use sound absorption and diffusion. These techniques help control sound waves for a more immersive experience.

Sound Wave Behavior in Enclosed Spaces

In closed spaces, sound waves interact with surfaces and objects in complex ways. This can cause echoes, reverberations, and sound reflections. Knowing how sound waves behave lets us design solutions to these problems. This way, we can improve the listening experience.

Common Acoustic Challenges in Media Rooms

Media rooms face many acoustic challenges, like echoes and reverberations. Sound reflections and noise control issues are also common. To solve these, we use sound absorption, diffusion, and sound diffusion strategies. Understanding these challenges helps us design better solutions for a more engaging experience.

The Role of Room Geometry

Room geometry is key in shaping sound in media rooms. The room’s shape, size, and where speakers and seats are placed all matter. By thinking about room geometry, we can design noise control and sound diffusion strategies. This makes the experience more immersive and engaging.

Grasping the basics of media room acoustics is essential. It includes understanding sound wave behavior, common challenges, and room geometry’s impact. With effective noise control and sound diffusion strategies, we can enhance the listening experience.

The Science Behind Acoustic Millwork Solutions

Choosing the right materials is key to making sound solutions work. Each material reacts differently to sound waves. We pick materials based on their density, texture, and how well they absorb sound.

Acoustic treatment is also important. It involves adding special treatments to materials to make them better at absorbing sound. This helps reduce echoes and reflections, making the sound experience better.

  • Applying sound-absorbing materials to the walls and ceiling
  • Installing diffusion panels to scatter sound waves
  • Using resonance control methods to minimize sound reflections

By using these methods and picking the right materials, we can make media rooms sound better.

MaterialSound-Absorbing Properties
WoodMedium to high absorption coefficient
FabricHigh absorption coefficient
GlassLow absorption coefficient

Understanding the science behind acoustic solutions helps us create top-notch sound systems. This meets the needs of architects and contractors who want the best sound in media rooms.

Essential Components of Media Room Design

Designing a media room requires careful thought about several key elements for the best sound quality. We aim to create an immersive experience. This means planning each component with precision. Effective resonance control is key to reduce unwanted sound reflections, making the audio clear and enjoyable.

A good media room focuses on soundproofing to block outside noise and keep sound quality high. This is done by placing speakers wisely, calculating the best viewing distances, and choosing the right lighting.

Speaker Placement Optimization

Speaker placement greatly affects sound quality in a media room. We suggest placing speakers to cut down echo and ensure sound is evenly spread. This might mean setting speakers at certain angles or using acoustic panels to soak up extra sound.

Viewing Distance Calculations

Figuring out the best viewing distance is vital for an immersive experience. We look at the room’s size, screen size, and seating to find the perfect balance. This creates a captivating atmosphere that pulls the viewer in.

Lighting Integration Considerations

Lighting is crucial in a media room, affecting the ambiance and viewing experience. We think about lighting intensity, color, and where it’s placed to make the room cozy and inviting. Good lighting helps with soundproofing and resonance control, making the experience more enjoyable.

Material Selection for Premium Sound Quality

When designing a media room, sound absorption and material choice are key. The right materials greatly affect sound quality. Our goal is to create an immersive experience, and material selection is crucial.

We look at various factors like the acoustic properties of materials. This ensures our media rooms focus on sound absorption and acoustic performance. We consider density, thickness, and texture, as well as how materials absorb or reflect sound.

Wood Types and Their Acoustic Properties

Wood is a favorite for media rooms, with different types having unique sound properties. Hardwoods like oak and maple have high density, reducing sound reflection and improving absorption. Softwoods might reflect sound more but can work well with the right finishes.

Composite Materials and Their Benefits

Composite materials, such as MDF and plywood, are great for media rooms. They can be engineered for specific sound properties, making them perfect for absorption and soundproofing. They’re also cost-effective and sustainable compared to traditional wood.

Surface Treatments and Finishes

The surface treatment and finish of a material greatly affect its sound properties. A smooth surface might reflect sound more than a textured one. We choose materials that enhance sound absorption and quality, creating an immersive experience.

By focusing on material selection and sound absorption, we create media rooms with exceptional sound quality. Our expertise in material selection and acoustic design ensures our clients get premium sound quality that meets their expectations.

MaterialAcoustic PropertiesSound Absorption
WoodDensity, texture, and thicknessVariable, depending on type and surface treatment
Composite MaterialsEngineered for specific acoustic propertiesHigh sound absorption potential
Surface Treatments and FinishesImpact on sound reflection and absorptionSignificant impact on overall sound quality

Custom Acoustic Millwork Design Principles

We think custom acoustic millwork design is key for great sound in media rooms. We use acoustic panels and acoustic treatment to tackle each room’s sound challenges.

Important things to think about in custom acoustic millwork design are:

  • Room shape and how sound moves
  • Where speakers go and how sound is absorbed
  • Choosing materials and surface finishes

Our approach to acoustic design makes media rooms better. Acoustic treatment is vital to cut down echo and improve sound quality.

Our team creates unique millwork designs to enhance media room experiences. We use acoustic panels and acoustic treatment to help architects and contractors make amazing media rooms.

Integration of Sound Absorption Technologies

Creating immersive media rooms means focusing on sound quality. Sound absorption technologies help by reducing noise and resonance. This makes the audio experience better. We use diffusion panels, resonance control, and bass management to achieve this.

Noise control is key in media rooms for better audio quality. Resonance control methods cut down on unwanted vibrations and sounds. This makes the sound environment more balanced and the listening experience more immersive.

Diffusion Panel Design

Diffusion panels are a big part of our sound strategy. They scatter sound waves to reduce echoes and reflections. Adding these panels to our media room design improves sound distribution. This makes the audio experience more engaging and immersive.

Resonance Control Methods

Resonance control is vital in our sound approach. It helps minimize unwanted vibrations and sounds. This is crucial in media rooms for accurate sound reproduction and an immersive experience.

Bass Management Solutions

Bass management is essential in our sound strategy. It controls low-frequency sound waves for a balanced audio experience. This is key in media rooms for an engaging and immersive experience.

Aesthetic Considerations in Acoustic Treatment

When designing a media room, it’s key to find a balance. Aesthetic considerations are crucial in acoustic treatment. The room should not only sound great but also look amazing. We focus on sound diffusion and soundproofing to keep the space visually appealing.

Architects and contractors can blend acoustic treatments into their designs. They use materials and techniques that boost sound quality and look good. For instance, acoustic panels can be made to fit the room’s style, adding both beauty and function.

  • Using materials that absorb sound while also being visually appealing
  • Designing acoustic panels that match the room’s decor
  • Integrating soundproofing materials into the room’s design

By focusing on looks, media rooms become stunning spaces with top-notch sound. They perfectly combine form and function.

Installation Best Practices for Acoustic Millwork

Getting acoustic millwork installed right is key to its success. It’s important to follow best practices for sound absorption and using acoustic panels. This way, architects and contractors can make sure their media rooms sound great.

Installing acoustic millwork well means planning and doing it right. You need to check the room’s sound, pick the best materials, and install them correctly. Sound absorption is crucial to cut down echo and make the sound better.

Preparation Requirements

Before you start, get the room ready. This means:

  • Measuring the room’s size and layout
  • Finding spots where sound might bounce back
  • Picking the right acoustic panels

Professional Installation Guidelines

For the best results, follow professional tips. This includes:

  • Putting acoustic panels in the right spots
  • Using the correct mounting tools and methods
  • Sealing and aligning everything properly

Quality Control Measures

It’s also important to check the quality of the installation. This means:

MeasureDescription
Visual InspectionChecking if everything is installed right
Acoustic TestingChecking how well the sound is absorbed
Performance EvaluationTesting how well the sound quality is

By sticking to these guidelines, architects and contractors can make sure their acoustic millwork sounds amazing. They use sound absorption and acoustic panels to create the perfect media room.

Maintenance and Care of Acoustic Treatments

Keeping acoustic treatments in good shape is key to their lasting performance. We stress the need for material selection to keep sound quality high. The right materials help reduce sound reflections and absorptions, ensuring the best sound.

It’s important to regularly check and clean acoustic treatments. This stops dust and debris from harming sound quality. This is especially true for acoustic treatment materials that easily get dusty. With proper care, media rooms can keep delivering great sound.

Here are some tips for keeping acoustic treatments in top shape:

  • Regular cleaning and dusting of treatment surfaces
  • Inspections for damage or wear and tear
  • Replacement of worn-out or damaged materials

By sticking to these tips and focusing on material selection and acoustic treatment upkeep, architects and contractors can keep their media room designs sounding great for years.

Performance Testing and Optimization

Creating the perfect media room is all about performance testing and optimization. We use special tools to check how well the room controls noise and diffuses sound. These tools show us where we need to make changes to get the best sound quality.

We then adjust the placement of sound-control elements like panels and diffusers. This fine-tuning helps us achieve the perfect balance of sound diffusion and noise control. The goal is to create an immersive experience that fully engages the audience.

Acoustic Measurement Tools

We use sound level meters and acoustic analyzers to measure the room’s sound quality. These tools give us precise data. This data helps us pinpoint areas that need improvement and make informed decisions to optimize the space.

Performance Validation Methods

After optimizing the media room, we validate its performance. We conduct listening tests and acoustic measurements to ensure it meets our high standards. These evaluations confirm that the space offers an exceptional audio experience.

Through these methods, we create media rooms that offer an unmatched audio experience. Our expertise in performance testing and optimization helps us turn architectural visions into reality. This results in spaces that exceed our clients’ expectations.

Acoustic Measurement ToolDescription
Sound Level MeterMeasures the sound pressure level in the room
Acoustic AnalyzerProvides detailed analysis of the room’s acoustic properties

Conclusion: Maximizing Your Media Room Investment

Exploring acoustic design and custom millwork shows us how to make the most of your media room. By focusing on resonance control and soundproofing, experts can make rooms that offer an unmatched audio experience. This lets viewers fully enjoy both the visuals and the sound.

Using absorption and diffusion technologies, and choosing top-notch materials, we can shape the sound environment. This approach reduces echoes and standing waves, making the room sound better. It also ensures the room looks great, blending beauty with function.

The key to a great media room is a space that looks amazing and sounds incredible. By following the tips in this article, you can make your media room the best it can be. This will take your home entertainment to a whole new level.

FAQ

What is the role of sound absorption and acoustic panels in media room acoustics?

Sound absorption and acoustic panels are key to great sound in media rooms. They control noise and spread sound evenly. This makes the audio experience more immersive and engaging.

How do sound waves behave in enclosed spaces like media rooms?

It’s important to know how sound waves act in closed spaces. They can bounce back, absorb, or spread out. Understanding this helps in designing media rooms with better sound.

What are the key material selection considerations for achieving premium sound quality?

Choosing the right materials is crucial for top-notch sound. Different woods, composite materials, and finishes affect sound absorption and resonance. These choices greatly impact the room’s sound quality.

How do custom acoustic millwork design principles contribute to exceptional media room sound?

Custom designs, including acoustic panels, are vital for great sound. They address each room’s unique sound challenges. This ensures an outstanding audio experience.

What are the best practices for integrating sound absorption technologies in media room design?

Using sound absorption technologies is essential. This includes designing diffusion panels and managing bass. It helps reduce noise and improve sound quality.

How can aesthetic considerations be balanced with acoustic treatment in media rooms?

It’s important to blend looks and sound in media rooms. Acoustic treatments should be hidden yet effective. This creates a room that looks great and sounds amazing.

What are the key installation best practices for ensuring optimal performance of acoustic millwork?

Proper installation is critical for acoustic millwork’s success. This includes preparation, following professional guidelines, and quality checks. It ensures the millwork works as intended.

How can media room owners maintain and care for their acoustic treatments over time?

Keeping acoustic treatments in good shape is vital. Choose the right materials and follow maintenance tips. This helps keep the sound quality high over time.

What techniques are used to test and optimize the performance of media room acoustics?

Testing and optimizing involve using special tools and methods. These ensure the room meets sound quality standards. They help create an exceptional audio experience.

glass cabinet integration

Glass Integration: Technical Solutions for Cabinet Door Inserts

We specialize in creating custom glass cabinet solutions that are top-notch in quality and design. Our team works closely with architects and contractors. We understand their vision and provide technical solutions that fit perfectly with their designs.

We focus on glass cabinet integration, making sure the glass type matches the cabinet’s look and function. We use industry terms and clear explanations to support our glass selection. This helps us choose the right glass for each project.

Our aim is to offer technical solutions that meet each project’s unique needs. We consider the importance of glass selection in glass cabinet integration. By working together, we can create custom cabinetry that goes beyond expectations and explores new possibilities in glass cabinet integration.

Key Takeaways

  • We provide custom glass cabinet integration solutions that meet the highest standards of quality and design
  • Our team works closely with architects and contractors to understand their vision and provide technical solutions
  • Precision and expertise in glass selection are crucial to bridging architectural vision with manufacturing reality
  • Industry-specific technical terms and clear explanations support our glass selection process
  • Collaboration is key to creating custom cabinetry solutions that exceed expectations in glass cabinet integration
  • Our solutions focus on glass selection to complement the overall aesthetic and functional requirements of the cabinet

Understanding Modern Glass Cabinet Integration Systems

Exploring glass cabinet integration, we find a world of systems. With many mounting systems and glass types, we craft solutions for each project. Our skills help merge design dreams with real-world manufacturing.

Choosing the right materials is key in glass cabinet integration. The perfect mix ensures the system works well and lasts long. We look at thermal expansion, load, and moisture to make sure the glass and frame bond well.

Contemporary Integration Methods

Today’s methods aim for a strong bond between glass and frame. Key methods include:

  • Frame-to-glass connection systems
  • Clamping systems
  • Adhesive bonding

System Components Overview

A glass cabinet system has glass, mounting, and frame. Each part is vital for the system’s performance and safety.

Material Compatibility Considerations

We pick materials for durability, greenness, and looks. Popular glass types are tempered, laminated, and low-iron. With the right materials and mounting systems, we make custom cabinets for any project.

Essential Glass Selection Criteria for Cabinet Doors

Choosing the right glass for cabinet doors is key. We work with architects and contractors to create top-notch custom cabinetry. We pick the glass that fits the design and meets performance needs. We look at the glass type, thickness, and how it fits into the frame design.

It’s important to match the glass with the cabinet’s frame design. We think about the mounting system and how it looks. This way, the glass improves the cabinet’s look and meets safety and performance standards.

  • Clarity and transparency
  • Thickness and durability
  • Compatibility with the frame design
  • Mounting system requirements

We make sure the glass fits the standards and boosts the cabinet’s design.

We connect architectural dreams with real-world manufacturing. Our team helps clients pick the best glass for their cabinet doors. We consider each project’s unique needs. This way, we give clients the knowledge to choose wisely for their glass selection and frame design.

Professional Mounting Systems and Hardware

For glass cabinet integration, the right mounting systems and hardware are key. We offer top-notch mounting systems for durability and safety. Our team picks the best hardware for each project, ensuring a secure and lasting installation.

The choice of frame-to-glass connection affects the installation’s durability and safety. We do load-bearing calculations to make sure the mounting system can handle the glass’s weight. This way, we avoid compromising the cabinet’s structure.

Frame-to-Glass Connection Types

There are different frame-to-glass connections like clip-on, adhesive, and mechanical systems. Each has its own benefits and drawbacks. We work with clients to find the best connection for their project.

Load-Bearing Calculations

Load-bearing calculations are vital for supporting the glass’s weight. Our team uses special software for these calculations. We consider the glass’s size, weight, mounting system, and cabinet structure.

Hardware Selection Guidelines

Our hardware selection is based on our extensive experience. We look at the glass type, size, weight, and project needs. Our aim is to provide a secure and lasting installation that our clients will love.

Choosing the right mounting systems and hardware is crucial for a successful glass cabinet integration. Our team is committed to delivering high-quality installations that are both functional and beautiful.

Managing Thermal Expansion in Glass Cabinet Installations

We know how important it is to manage thermal expansion in glass cabinets. It affects their durability and stability. When materials like glass expand or contract with temperature changes, it can cause damage.

To handle this, we use temperature control and choose materials that expand less. This keeps the glass cabinets stable and secure. Temperature control is key to managing these changes.

Here are some important steps for managing thermal expansion in glass cabinets:

  • Material selection: Pick materials that expand similarly to avoid damage.
  • Design and engineering: Design the cabinet and glass parts carefully to reduce expansion effects.
  • Installation techniques: Use expansion joints or flexible seals to manage expansion.

By managing thermal expansion well, we make glass cabinets that look great and last long.

Our team keeps up with the latest in thermal expansion management. This ensures our clients get the best solutions for their glass cabinets. By focusing on thermal expansion management, we give our clients peace of mind and a beautiful, lasting glass cabinet.

Safety Standards and Compliance Requirements

Safety is key when integrating glass cabinets. We follow strict safety rules to protect our clients and ensure our work is top-notch. Our team knows all about the rules for glass cabinet integration. This includes safety standards, testing, and certification.

We take safety seriously because we understand its importance. Following safety rules shows our dedication to quality. This way, we can promise our glass cabinet integrations are safe and reliable.

Key Components of Regulatory Compliance

  • Testing protocols to ensure the safety and quality of our solutions
  • Certification requirements to guarantee compliance with regulatory standards
  • Ongoing monitoring and evaluation to maintain the highest level of safety and quality

We focus on safety and following rules to ensure our work is of the highest quality. Our team keeps up with new safety rules. This helps us give our clients the best solutions.

Advanced Glazing Techniques for Cabinet Applications

We’re always looking to improve glass use in cabinet design. Advanced glazing techniques help boost performance and durability. Our team excels in moisture control methods to stop water damage and keep installations lasting longer.

Important aspects of advanced glazing include:

  • Sealing technologies to keep moisture and air out
  • Best practices for installation to apply these techniques right
  • Regular upkeep to avoid problems and make cabinets last longer

Using these advanced techniques, we make glass cabinets that last and meet architect and contractor needs.

Moisture Control Methods

Keeping moisture out is key to avoiding water damage and making installations last. Our team employs various methods, like sealing technologies and glazing techniques, to protect against moisture and air leaks.

Sealing Technologies

Sealing technologies have improved a lot. They now offer better protection against moisture and air leaks. We use silicone and polyurethane-based sealants to seal effectively and prevent problems.

Installation Best Practices

We’re skilled in the best ways to install these advanced glazing techniques. This ensures our glass cabinet integrations are top-notch and last a long time. By sticking to these best practices, we meet the needs of architects and contractors.

Environmental Control and Performance Optimization

We know how key environmental control is for glass cabinet performance. Humidity, temperature, and sunlight can impact the glass and cabinet. Our solutions include environmental control to keep the cabinet working well in different conditions.

Optimizing performance optimization helps the cabinet last longer and look great. We focus on the materials, design, and installation. For example, using materials that resist humidity and temperature changes prevents damage.

Important aspects for environmental control and performance optimization are:

  • Humidity control: keeping moisture levels stable to avoid damage
  • Temperature control: managing temperature to prevent damage from expansion or contraction
  • UV protection: using materials that block UV rays to prevent fading or discoloration

By considering these, we make glass cabinet integrations that are beautiful and durable. Our aim is to offer solutions that meet architects and contractors’ needs. We also ensure our products are eco-friendly and sustainable.

Maintenance and Long-term Care Protocols

Keeping your glass cabinet in top shape is key. We offer detailed manuals and guides to help you care for it. Following our cleaning guidelines is crucial to avoid damage.

Setting up a maintenance routine is smart. It helps catch problems early. This includes checking for loose parts and ensuring the glass fits right.

Here are some important cleaning guidelines to remember:

  • Stay away from harsh cleaners and rough materials
  • Use a soft cloth to clean the glass and cabinet
  • Look for any damage on the glass panels often

By sticking to these maintenance and cleaning guidelines, your glass cabinet will last longer. It will also keep looking great for years.

Maintenance TaskFrequency
Inspect glass panels for damage or wearMonthly
Check for loose hardwareQuarterly
Clean glass panels and cabinet surfacesWeekly

Conclusion: Advancing Glass Integration Technology

Looking ahead, glass integration will be key in cabinetry design. The field is always changing, thanks to new tech. This brings better function, performance, and looks. We’re always learning to give our clients the latest in glass cabinet tech.

We connect design dreams with real-world making. This means glass cabinets that look great and last long. Our focus on research and expertise makes us leaders in glass tech. We’re ready to help our clients make their design dreams real.

FAQ

What are the key considerations for glass selection in cabinet doors?

Choosing the right glass for cabinet doors involves several factors. You need to think about the type of glass, its thickness, and how it fits into the cabinet frame. The design of the frame is also crucial. It must match the glass type and mounting system.

How do professional mounting systems and hardware ensure a secure glass cabinet installation?

Professional mounting systems are key for a secure glass cabinet. The connection between the frame and glass affects durability and safety. It’s important to calculate the load to ensure the system can handle the glass’s weight without damaging the cabinet.

Why is managing thermal expansion important in glass cabinet installations?

Thermal expansion is crucial because glass and the frame expand and contract differently with temperature changes. To avoid damage, managing thermal expansion is essential. Our solutions include temperature control and materials that reduce expansion effects.

What are the safety standards and compliance requirements for glass cabinet integration?

Safety is a top priority, and following regulatory standards is essential. These standards cover safety, testing, and certification. Our team ensures our solutions meet these standards, with thorough testing and certifications.

How do advanced glazing techniques enhance the performance and durability of glass cabinet integrations?

Advanced glazing techniques improve glass cabinet performance and durability. Moisture control and sealing are key to prevent water damage. Our expertise ensures these techniques are applied correctly.

What are the key aspects of environmental control and performance optimization for glass cabinet integrations?

Environmental control is crucial for glass cabinet performance. Humidity, temperature, and sunlight exposure can impact the glass and cabinet. Our solutions include measures to control these factors, improving performance and lifespan.

What are the recommended maintenance and long-term care protocols for glass cabinet integrations?

Proper maintenance is vital for glass cabinet longevity. We provide cleaning guidelines, maintenance schedules, and troubleshooting tips. This helps our clients enjoy their cabinets for many years.

tall cabinet installation

Floor-to-Ceiling Precision: Installing Tall Cabinets in Uneven Spaces

We work with architects and contractors to tackle the challenges of uneven spaces. Our goal is to find practical solutions for these issues. We focus on precision and expertise to make sure every installation is top-notch.

Achieving perfect alignment in floor-to-ceiling cabinetry is more than just about the cabinets. It’s about managing uneven surfaces and wall irregularities. We use precise leveling techniques and careful planning to ensure a successful installation.

Introduction to Tall Cabinet Installation

Precision is key in tall cabinet installation, especially when dealing with height variations. By using the right tools and techniques, we can meet the highest standards of quality and performance.

Key Takeaways

  • Tall cabinet installation requires precision and expertise to address height variations and wall irregularities.
  • Advanced leveling techniques are essential for ensuring perfect alignment in floor-to-ceiling cabinetry.
  • Careful planning and consideration of uneven surfaces are crucial for a successful installation.
  • Our approach balances expertise with accessibility, providing practical solutions for overcoming installation challenges.
  • By bridging the gap between architectural vision and manufacturing reality, we can ensure that every installation meets the highest standards of quality and performance.
  • Utilizing the right tools and techniques is essential for a successful tall cabinet installation.

Understanding the Challenges of Tall Cabinet Installation

Installing tall cabinets can be tricky due to wall irregularities. These issues can mess with the alignment solutions and need adjustments for proper fit. It’s key to think about how wall irregularities might affect the installation.

To tackle these problems, we can use several approaches, including:

  • Doing detailed site checks to spot wall irregularities
  • Creating special installation methods for unique sites
  • Using special tools and gear for exact alignment solutions

By understanding the hurdles of wall irregularities and finding ways to overcome them, we can achieve top-notch tall cabinet installations.

ChallengeSolution
Wall irregularitiesCustomized installation methods
Alignment issuesPrecise alignment solutions
Installation challengesSpecialized tools and equipment

Essential Tools and Materials for Professional Installation

Having the right tools and materials is key for a great installation. Our team uses special equipment for leveling techniques and vertical adjustment. This ensures precise adjustments and perfect alignment. We invest in top-quality tools and materials for a superior finish and long-term performance.

Some of the essential tools and materials we use include:

  • Leveling devices for accurate measurements
  • Adjustable feet for vertical adjustment
  • High-strength fasteners for secure installation
  • Custom-made templates for precise fitting

Our team is dedicated to making architectural visions a reality. We use leveling techniques and vertical adjustment equipment. This ensures our installations meet the highest quality and performance standards.

We are committed to giving our clients the best solutions for custom cabinetry. We combine our expertise with the latest technology and top-quality materials. Our goal is to deliver exceptional results that exceed our clients’ expectations and provide long-term satisfaction.

Tool/MaterialPurpose
Leveling devicesAccurate measurements
Adjustable feetVertical adjustment
High-strength fastenersSecure installation

Pre-Installation Assessment and Planning

Before starting the installation, a detailed pre-installation phase is key. This step involves checking the site for any challenges and finding solutions. Our team uses special tools to get accurate measurements and marks.

Planning each installation carefully helps avoid mistakes. This way, we ensure our work meets top quality and precision standards.

Managing gaps is also important in this phase. We look for any gaps or uneven areas and plan how to fix them. Our team uses scribe fitting to make sure the cabinet fits perfectly with the wall.

By planning well, we guarantee a high-quality finish that meets our clients’ expectations.

  • Measuring and marking the site for accurate cabinet placement
  • Creating templates for complex installations
  • Finding support points for structural stability

Our detailed pre-installation process ensures our methods fit each project’s needs. This way, the final result shows our expertise and care.

Advanced Leveling Techniques for Uneven Surfaces

When installing tall cabinets, leveling techniques are key. They ensure the cabinets are perfectly aligned and stable, even on uneven surfaces. Our team has mastered these techniques to handle height variations and other irregularities. This guarantees a professional finish and long-term performance.

We combine traditional methods with modern tools for this task. For instance, we use laser leveling to measure and adjust the cabinet’s position. This method helps us account for even the smallest height variations and ensures a precise fit.

Some important considerations for advanced leveling techniques include:

  • Assessing the surface for any irregularities or obstructions
  • Using specialized tools, such as leveling feet, to adjust the cabinet’s position
  • Verifying the cabinet’s stability and alignment using plumb lines and leveling instruments

By mastering these advanced leveling techniques, we ensure our tall cabinets are installed with precision and care. This is crucial for overcoming height variations and other irregularities. It guarantees a professional finish and long-term performance.

Leveling TechniqueDescription
Laser LevelingUses a laser to accurately measure and adjust the cabinet’s position
Leveling FeetSpecialized tools used to adjust the cabinet’s position and ensure stability
Plumb Lines and Leveling InstrumentsUsed to verify the cabinet’s stability and alignment

Step-by-Step Tall Cabinet Installation Guide

Installing tall cabinets requires precision and expertise. Our team has created a detailed guide for architects and contractors. This guide helps you install cabinets successfully, meeting your specific needs.

The first step is to choose the best installation method for your project. Consider the wall type, floor levelness, and cabinet weight. Using alignment solutions is key to ensure cabinets are level and aligned correctly.

After picking the right method, position the cabinets carefully. Make sure they are level and plumb. Use shims and anchors to secure them to the wall for stability.

Securing and Anchoring Procedures

To secure the cabinets, use screws and anchors together. This creates a strong hold, preventing cabinets from shifting. Fine-tune their position with vertical adjustment for perfect alignment.

Alignment Verification Steps

After installation, check if the cabinets are aligned and level. Use a level and plumb line for this. Following these steps and using the right tools ensures a successful installation.

Managing Gaps and Wall Irregularities

Installing tall cabinets requires careful attention to gaps and wall irregularities for a smooth finish. Our team uses scribe fitting to make a custom fit that hides any flaws. This ensures the cabinets look like they were built into the wall.

Gap management is key, needing precise measurement and planning for a perfect fit. With scribe fitting, we create a mold that fills gaps, making the surface even. This improves the look of the cabinets and makes them last longer.

Common wall issues like uneven surfaces, corners, and edges need special care. We use scribe fitting and custom molding to fix these problems. For example:

  • Uneven surfaces: We make a custom mold to fill gaps and irregularities, making the surface even.
  • Corners: We combine scribe fitting and molding for a seamless joint between the cabinet and wall, removing gaps.
  • Edges: Custom molding gives a precise fit between the cabinet and wall, making the surface smooth.

Our techniques ensure a precise fit and a seamless finish, even in tough spots. Our skill in gap management and scribe fitting lets us offer top-quality, custom cabinetry that fits our clients’ needs.

TechniqueDescription
Scribe FittingA technique used to create a custom mold that fills any gaps or irregularities between the cabinet and the wall.
Custom MoldingA solution used to create a precise fit between the cabinet and the wall, resulting in a smooth, even surface.

Professional Tips for Vertical Adjustment

Installing tall cabinets requires vertical adjustment with great care. We work with architects and contractors to make sure everything is perfect. Our tips help you get it right, using special tools and leveling techniques for a top-notch finish.

Here are some important tips for vertical adjustment:

  • Use a high-quality level to ensure the cabinet is perfectly plumb
  • Employ specialized shims or wedges to fine-tune the adjustment
  • Utilize a laser level to verify the alignment and make any necessary adjustments

By following these tips and using the right tools, you can ensure a professional finish. We aim to deliver the best custom cabinetry solutions. Precision and expertise are key in every step, including vertical adjustment and leveling.

We’re dedicated to helping you succeed with your installations. Together, we can achieve amazing results. We use the best techniques for vertical adjustment and leveling.

Troubleshooting Common Installation Challenges

Installing tall cabinets can be tricky. Our team knows how to fix common problems. We use installation methods that avoid issues.

We have special alignment solutions for precise fitting. Our team also focuses on gap management for looks and function.

Dealing with Plumb Issues

Plumb problems are common. We use advanced tools for perfect alignment and security.

Addressing Weight Distribution

Weight is key during installation. We consider the cabinet’s weight and what it will hold. This ensures safety and stability.

Solving Alignment Problems

Alignment can be tough. But our team has the skills to solve these problems. We aim for top quality and performance.

Conclusion: Ensuring Long-Term Stability and Performance

Installing tall cabinets in uneven spaces needs careful planning and skill. This ensures a tall cabinet installation that looks great and lasts long. Following the steps in this guide helps architects and contractors achieve this goal.

At our company, we focus on making architectural dreams come true. Our expertise in tall cabinet installation helps us create custom solutions. These solutions fit perfectly in your space, no matter how tricky it is. We aim to go beyond your expectations and make your ideas real and useful.

FAQ

What are some common wall and floor irregularities that can impact tall cabinet installation?

Irregularities like uneven surfaces, out-of-plumb walls, and varying floor heights can affect cabinet installation. These issues require special techniques and adjustments for a successful installation.

How do height variations affect the overall installation process?

Height variations can significantly impact the installation. Proper leveling and vertical adjustments are key to aligning cabinets perfectly. Expertise and specialized tools are needed for a professional finish.

What are some essential tools and materials for a professional tall cabinet installation?

For a professional installation, you need specialized leveling tools, vertical adjustment mechanisms, and quality fasteners and anchors. These tools help our team make precise adjustments and ensure the cabinets’ stability.

How do you approach the pre-installation assessment and planning phase?

The pre-installation phase is crucial for identifying challenges and planning solutions. We use measuring and marking techniques, create templates, and identify support points. This careful planning minimizes errors and ensures quality.

What are some advanced leveling techniques for installing tall cabinets on uneven surfaces?

Techniques like using shims, adjustable legs, and specialized hardware are key for uneven surfaces. Our team’s understanding of leveling ensures cabinets are aligned and stable, even in tough environments.

Can you provide a step-by-step guide for the tall cabinet installation process?

Our guide covers the entire installation process, from positioning to final alignment. It shows our commitment to precision and expertise, offering practical solutions for a successful installation.

How do you manage gaps and wall irregularities during the installation process?

Managing gaps and irregularities is critical. We use scribe fitting and custom molding for a seamless finish. This attention to detail ensures a superior finish and long-term performance.

What are some professional tips for achieving accurate vertical adjustment?

Vertical adjustment requires precision and expertise. Our tips on using specialized tools and techniques help ensure a professional finish and long-term performance.

How do you troubleshoot common installation challenges, such as plumb issues, weight distribution, and alignment problems?

Troubleshooting common challenges is essential. Our team’s expertise helps resolve issues like plumb problems, weight distribution, and alignment. This ensures a successful installation that meets high standards.

curved cabinetry

Radius Millwork: Manufacturing Techniques for Curved Cabinetr

We specialize in creating custom curved millwork that brings architectural visions to life. Curved panels are a key part of our work, adding a unique look and function. We make sure our solutions are top-notch and fit our clients’ needs, whether it’s curved millwork or panels.

Our focus on curved millwork is all about precision and skill. We know how crucial it is to get it right, as it can either enhance or ruin a space. That’s why we use advanced techniques to make sure our clients’ designs come to life perfectly, whether it’s for curved panels or other millwork.

Working with architects and contractors, we stress the value of teamwork and tackling common challenges together. Our aim is to connect the dream of architectural designs with the reality of manufacturing, using our curved millwork expertise to craft premium custom cabinetry.

Key Takeaways

  • We specialize in creating custom curved millwork and curved panels.
  • Our approach balances expertise with accessibility to ensure high-quality solutions.
  • Precision and expertise are crucial in curved millwork manufacturing.
  • We focus on bridging the gap between architectural vision and manufacturing reality.
  • Curved panels and curved millwork can transform a space or become a costly disaster if not done correctly.
  • Partnership and shared industry challenges are essential in our work with architects and contractors.
  • Our goal is to create high-end custom cabinetry solutions using our expertise in curved millwork.

Understanding the Fundamentals of Curved Cabinetry Design

Curved cabinetry design is an art that needs a deep understanding of radius construction and radius design principles. It’s about finding the right balance between looks and function. Our team works with architects and contractors to make sure every detail is perfect, from start to finish.

Creating perfect curves in cabinetry involves math. We consider the radius, material, and the look we want. This way, we make curved cabinetry that looks great and works well.

Basic Principles of Radius Construction

Radius construction uses curved lines to make designs flow smoothly. We use techniques like bent lamination and steam bending. Knowing these basics helps us make curved cabinetry that’s both beautiful and strong.

Essential Design Considerations

When designing curved cabinetry, we think about a few key things. We look at the material, the curve we want, and how it will be used. This way, we meet our clients’ needs and show off our radius design skills.

Mathematical Calculations for Perfect Curves

Math is key to getting perfect curves in cabinetry. We use special software and methods for precise calculations. This makes sure our curved cabinetry is not just beautiful but also practical and long-lasting.

Materials Selection for Curved Cabinet Construction

Choosing the right materials for curved cabinet construction is key. The materials’ look, durability, and function are all important. We pick the best materials for each project, aiming for quality and performance that our clients will love.

Bent lamination is a common method for curved parts. It stacks thin wood strips to form the curve. The wood type and layer count depend on the project’s needs.

When picking materials, we think about several things:

  • Wood type and grain pattern
  • Moisture resistance and durability
  • Color and finish options
  • Sustainability and environmental impact

By choosing the right materials and using bent lamination, we make curved doors that are both beautiful and useful. Our clients always get more than they expect.

Essential Tools and Equipment for Radius Work

At Radius Millwork, we know how key the right tools and equipment are. They help us make precise and quality curved cabinetry. Our team uses special equipment and traditional woodworking tools for complex curves and designs. We invest in the latest tech and training to ensure top-notch results.

For bending techniques, the right equipment is essential. We use vacuum presses and steam bending machines for smooth curves. These tools let us work with wood, metal, and glass, making complex shapes.

Specialized Bending Equipment

  • Vacuum presses for precise curve creation
  • Steam bending machines for smooth and flexible curves
  • Custom-made bending jigs for intricate designs

We also use traditional woodworking tools like table saws and sanders. These tools help us prepare and finish our curved cabinetry. Our expertise in bending techniques ensures high-quality, custom pieces for our clients.

Digital Design and Layout Tools

We use digital tools like CAD software and CNC machines for our projects. These tools help us design and make our curved cabinetry with precision. They make our work accurate and efficient.

ToolDescription
CAD softwareUsed for designing and planning curved cabinetry projects
CNC machinesUsed for manufacturing curved cabinetry components with precision and accuracy

Bent Lamination Techniques for Professional Results

We specialize in bent lamination techniques. These create strong, durable, and visually stunning curved components. Our team’s expertise ensures every curve is precise, every joint is strong, and every finish is flawless.

Some key benefits of bent lamination include:

  • Increased strength and durability
  • Improved aesthetic appeal
  • Enhanced versatility in design

By using bent lamination techniques, we achieve professional results. These results meet the highest standards of quality and aesthetics. Our goal is to connect architectural vision with manufacturing reality through precision and expertise.

Our approach to bent lamination involves careful planning and precise execution. We work closely with architects and contractors. This ensures every project meets their unique needs and expectations.

Form Creation and Mold Making Processes

At Radius Millwork, we know how crucial precise form creation is in curved cabinetry. This step lets us make complex curves and custom shapes for our clients. Our skilled team combines old techniques with new tech to make forms that last and are spot on.

The form creation process has several important steps. First, we design and pick materials. Then, we build the form. We work with our clients to get their design needs right. This way, we make forms that fit their exact needs.

Building Custom Forms

Creating custom forms needs a lot of care and detail. Our team uses hand-crafting and CNC machining to make forms that are precise and consistent. We also use special software to plan and test the form-making process. This ensures our forms work well and are efficient.

Material Selection for Molds

Choosing the right materials for molds is key in curved cabinetry. We pick materials that are tough, stable, and can get the look our clients want. We talk to our clients about what they like and need. Then, we pick materials that fit those needs. Common mold materials include wood, metal, and plastic.

Here are some key things to think about when picking materials:

  • Durability: The material must handle the manufacturing process well.
  • Stability: It should not warp or change shape easily.
  • Finish: It should be able to get the look our clients want, whether it’s smooth or textured.

Advanced Manufacturing Methods for Curved Panels

We use advanced methods to make curved panels that look great and last long. Our skill in bending ensures every curve is perfect. These panels are key in custom cabinets, and our methods make complex curves easy.

Steam Bending Applications

Steam bending shapes wood into curves by applying steam. It’s perfect for complex shapes and used in luxury cabinets.

Vacuum Pressing Techniques

Vacuum pressing shapes wood into curves using a vacuum press. It’s precise, allowing tight control over the panel’s shape.

Our knowledge in bending, like steam and vacuum pressing, lets us make stunning, durable panels. We use these methods for custom cabinets and furniture. Our work adds beauty and function to any space.

  • Precision control over the curvature of the panel
  • Ability to create complex curves and shapes
  • Durable and long-lasting panels
  • Visually stunning results

Our advanced methods ensure our curved panels are top quality. They meet and exceed our clients’ expectations. Our skills in bending and panels let us create amazing custom cabinets and furniture.

Hardware Solutions for Curved Cabinet Doors

Choosing the right hardware for curved doors is key. It ensures they work well and look great. At Radius Millwork, we help our clients pick the best hardware. We aim for a balance between function and style.

Some important things to think about include:

  • Hinge selection: Finding hinges that fit the curved door and work smoothly.
  • Handle selection: Picking handles that are both useful and look good, considering the door’s curve.
  • Other hardware: Making sure locks and latches match the curved door’s design.

We use specific terms to explain our process. Our goal is to make doors that are not just beautiful but also strong and easy to use. For instance, curved doors need special hinges. These ensure the doors open smoothly and last a long time.

Working with our clients, we create custom curved doors that fit their needs perfectly. Our knowledge in curved cabinetry lets us offer solutions that are both functional and stylish.

Hardware ComponentConsiderations for Curved Doors
HingesMust accommodate curved shape, provide smooth operation
HandlesMust be functional and visually appealing, considering curved shape
Locks and LatchesMust be compatible with curved door design

Quality Control and Testing Procedures

At Radius Millwork, we know how crucial quality control and testing are. We make sure our curved millwork products are top-notch. Our team works hard to meet and exceed our clients’ expectations.

We follow a strict quality control process. This includes checking for accuracy, surface quality, and structural integrity. We use advanced tools and methods to ensure our curved panels are precise and strong.

Measuring Accuracy and Consistency

We use the latest tools to check our curved millwork for accuracy and consistency. Our cutting and shaping equipment is top-notch. We also do regular quality checks to make sure our products are up to par.

Surface Quality Assessment

Our experts carefully check the surface quality of our curved panels. They look for smoothness, finish, and appearance. We use visual and tactile tests to ensure our products have a high-quality finish.

Structural Integrity Testing

We test the structural integrity of our curved millwork to ensure it’s strong and durable. We do load, impact, and cycle tests. This makes sure our products can handle the necessary loads and stresses safely.

Our quality control and testing procedures ensure our curved millwork products are of the highest quality. You can trust Radius Millwork to deliver products that meet your needs and exceed your expectations. Whether you’re an architect, contractor, or homeowner, we’ve got you covered.

Finishing Techniques for Curved Surfaces

At Radius Millwork, we know how crucial finishing techniques are for curved cabinetry. Our team has mastered various methods, from old-school techniques to new coating and polishing tech. This ensures our curved cabinetry and doors are both tough and beautiful.

When finishing curved surfaces, we focus on evenness and durability. We blend traditional skills with modern tech. Our team picks the best materials and uses them with precision for a perfect finish.

Our finishing methods include:

  • Hand-sanding and polishing for a shiny finish
  • Advanced coatings for extra durability and protection against scratches and fading
  • Specialized equipment for precise control in the finishing process

By combining our expertise in curved cabinetry with our advanced finishing, we create unique and stunning furniture. These pieces meet the highest standards of quality and beauty.

Conclusion: Mastering the Art of Curved Cabinetry Manufacturing

As we wrap up our look at radius construction, bent lamination, and other key curved millwork methods, it’s clear. Mastering curved cabinetry takes hard work, precision, and a deep understanding of the craft. At Radius Millwork, we’ve dedicated ourselves to honing these skills. We mix traditional craftsmanship with modern tech to offer top-notch custom cabinetry solutions.

We’re all about quality, detail, and making our customers happy. This has made us a go-to for architects and contractors looking for the best in curved cabinetry. Our skills in radius construction, creative bent lamination, and advanced manufacturing let us turn designs into real, beautiful spaces.

We invite you to see the Radius Millwork difference. Here, passion for the craft meets unmatched technical skill. Every curve tells a story of precision and craftsmanship. Let us help you bring your next custom cabinetry project to life.

FAQ

What are the basic principles of radius construction?

Radius construction starts with understanding curved surfaces. It involves knowing how radius and curvature relate. Also, you need to know the math for perfect curves. These basics help make curved cabinetry both useful and beautiful.

What are the essential design considerations for curved cabinetry?

Designing curved cabinetry requires careful thought. You must consider the structure, material, and how the curve fits in the space. Working with architects and contractors is key to meeting both looks and function.

How do you select the right materials for curved cabinet construction?

Choosing materials for curved cabinets is very important. It affects how they look, last, and work. Bent lamination is often used. Picking the right materials for this method is crucial for the best results.

What specialized tools and equipment are used for radius work?

For curved cabinetry, you need special tools like bending machines and vacuum presses. Digital design software is also important. Traditional tools help too, making sure every detail is perfect.

How do you create forms and molds for curved cabinetry?

Making custom forms and molds is a big step. It involves building precise forms and picking the right mold materials. Keeping these tools in top shape is key for quality results. Paying attention to detail is crucial.

What advanced manufacturing methods are used for curved panels?

Curved panels need special making methods like steam bending and vacuum pressing. These methods help make complex curves without losing panel integrity. Mastering these techniques is vital for top-notch curved cabinetry.

How do you select the right hardware solutions for curved cabinet doors?

Picking the right hardware for curved doors is important. Hinges and handles must work well and look good. The Radius Millwork team helps clients find the best hardware for their doors.

What quality control and testing procedures are in place?

Quality control and testing are key in curved cabinetry. They check for accuracy, surface quality, and structure. Radius Millwork aims for the best results through its quality control process.

What finishing techniques are used for curved surfaces?

Finishing curved surfaces needs special care. It ensures the finish is even, strong, and brings out the material’s beauty. Radius Millwork uses various methods to achieve a flawless finish for curved cabinetry.

wood grain matching

Seamless Transitions: Matching Wood Grains Across Large Cabinet Runs

We know how key it is to have smooth transitions in cabinets. This is true for both looks and function. Matching wood grains across big cabinet areas is a big challenge. It needs a lot of skill and precision to make it look right.

Matching wood grains is like an art. It’s about picking and arranging wood so the grain patterns blend well. This is key in making custom cabinets. We aim to mix design ideas with real-world making, ensuring top quality and looks, including matching wood grains.

In the world of custom cabinets, matching wood grains is very important. It helps make sure the cabinets look good and work well. By getting good at matching wood grains, we can make cabinets that are both beautiful and useful.

Key Takeaways

  • Seamless transitions between cabinet sections are crucial for aesthetic and functional reasons, requiring expertise in wood grain matching.
  • Wood grain matching is an art that requires precision and expertise to create visual continuity.
  • Visual continuity is essential in custom cabinetry manufacturing to bridge architectural vision with manufacturing reality.
  • Mastering wood grain matching is critical for creating cabinet runs that are both functional and visually stunning.
  • Wood grain matching requires careful selection and arrangement of wood pieces to create a smooth flow of grain patterns.
  • Custom cabinetry manufacturing demands attention to detail, including wood grain matching, to ensure the highest quality and aesthetics.
  • By prioritizing wood grain matching and visual continuity, we can create cabinet runs that exceed our clients’ expectations.

Understanding Wood Grain Matching Fundamentals

Wood grain patterns are complex and vary naturally. We study different grain types to match them well in large projects. Choosing the right wood is key to the final look.

Matching wood grain involves several factors. The type of wood, cutting methods, and desired pattern are important. For example, oak and maple have unique patterns that can be highlighted or toned down. The aim is to make the wood look cohesive and beautiful.

Types of Wood Grain Patterns

There are many wood grain patterns, including:

  • Straight grain patterns, found in pine and spruce
  • Irregular grain patterns, common in oak and ash
  • Figured grain patterns, seen in maple and cherry

Natural Variation in Wood Species

Wood species naturally vary, with features like knots and color changes. These can be good or bad, depending on the wood’s use. For instance, a wood with a unique knot might be sought after, while too many mineral streaks might not be suitable.

Knowing about wood grain patterns and natural variations helps us choose the right wood and cutting methods. This skill is crucial for creating top-notch custom cabinets that architects and contractors demand.

The Science Behind Perfect Wood Grain Matching

Getting wood grain to match perfectly is all about material sourcing. Different types of wood have their own grain patterns and properties. This affects how the wood looks in the end. By picking the right materials, we can make sure the grain looks consistent, creating a beautiful and unified look.

The grain direction is also key. It impacts the wood’s strength, stability, and how it looks. Knowing how wood works with its grain direction helps us choose the best materials. This knowledge helps us turn our design ideas into reality, making top-notch custom cabinets.

  • Wood species and their unique grain patterns
  • Grain direction and its impact on strength and stability
  • Material sourcing and selection

By carefully checking these factors and using our knowledge, we make cabinets that go beyond what our clients hope for. We mix beauty with function perfectly.

Essential Tools and Technologies for Grain Pattern Analysis

We know how important technology is in wood grain matching. It’s key for veneer selection and panel matching. Advanced tools and technologies have changed how we analyze and match grain patterns. This makes large cabinet runs look seamless.

We use digital matching software solutions for grain pattern analysis. This tech lets us pick the right veneer and panels for our projects. We consider color, texture, and pattern in our choices.

Digital Solutions for Veneer Selection

Some of the digital tools we use include:

  • Computer-aided design (CAD) software for detailed designs and prototypes
  • Grain matching algorithms for analyzing and matching grain patterns
  • Virtual reality (VR) technology for visualizing and interacting with designs

We also use physical measurement tools for accurate wood piece measurements. This includes calipers, micrometers, and other precise instruments.

Photography and Documentation Equipment

We use top-notch photography and documentation equipment to record and compare grain patterns. This includes:

  • High-resolution cameras for detailed images
  • Microscopes for examining grain patterns at a microscopic level
  • Specialized software for analyzing and comparing images

With these tools and technologies, we ensure precise veneer selection and panel matching. This results in seamless transitions and top-notch quality in our custom cabinetry.

Material Selection and Sourcing Strategies

We know how key material selection and sourcing are for wood grain matching success. Sequence matching is a vital step. It involves arranging wood pieces in a specific order for a seamless grain pattern. This process needs careful planning and execution, considering each wood species’ unique traits.

Choosing the right wood is crucial. We look at grain pattern, color, and texture to meet standards. Our team collaborates with suppliers to find top-quality wood that meets our high standards.

Important factors in material selection and sourcing include:

  • Wood species and grade
  • Grain pattern and direction
  • Color and texture
  • Sustainability and environmental impact

By selecting and sourcing materials with care, we ensure our wood grain matching is of high quality.

Our focus on sequence matching and wood selection ensures every detail is considered. This approach guarantees the best results for our clients.

Advanced Techniques in Veneer Sequence Matching

We focus on making seamless transitions in custom cabinetry. One key method we use is veneer sequence matching. This involves picking and arranging veneer sheets for grain patterns and visual continuity. This way, we create stunning, high-end cabinetry that meets exact architectural visions.

Our team uses advanced techniques for perfect wood grain matches. These include:

  • Book matching methods, which arrange veneer sheets in a pattern for a mirrored look.
  • Slip matching applications, which need careful veneer sheet placement for continuous grain patterns.
  • End matching procedures, which match grain patterns at the end of one sheet with the start of another.

By mastering these techniques, we ensure our custom cabinetry has grain patterns that are stunning and consistent. This focus on detail makes us stand out in the industry. It allows us to deliver top-notch results that meet the highest visual continuity standards.

Our dedication to precision and expertise helps us bring architectural visions to life. This results in custom cabinetry that goes beyond our clients’ expectations.

Planning Large Cabinet Runs for Visual Continuity

Creating large cabinet runs needs visual continuity. Panel matching is key here. It means picking and arranging panels for a smooth grain pattern. The right materials are also crucial for matching grain patterns perfectly.

Planning a large cabinet run well requires careful thought and detail. You must think about the material, grain pattern, and look you want. With good planning, architects and contractors can make cabinets that are both beautiful and useful.

Important things to think about for large cabinet runs include:

  • Panel matching: selecting and arranging panels to create a continuous grain pattern
  • Material sourcing: sourcing the right materials to ensure seamless grain pattern matching
  • Grain pattern: considering the type of grain pattern desired and how it will be achieved

By keeping these points in mind and planning well, architects and contractors can make amazing large cabinet runs.

Manufacturing Processes for Seamless Integration

We know that making custom cabinets work together well needs a lot of care. We pick the veneer carefully to match grain patterns. We also make sure the sequence matches to keep things looking good.

Our making process starts with CNC cutting. We use top software to cut down on waste. Then, we plan how to put everything together to meet our quality standards.

CNC Cutting Specifications

Our CNC tools are set up for exact cuts and smooth finishes. We check our tools often to keep them working right.

Assembly Sequence Planning

Our skilled team plans how to put everything together. They focus on matching grain patterns for a smooth look.

Quality Control Checkpoints

We check our work often to make sure it’s top-notch. We look at the veneer and sequence matching to ensure everything is perfect.

Common Challenges in Wood Grain Matching

Working with wood can bring challenges in matching grain patterns. It’s key to know the grain direction and pick the right wood species. Dealing with natural wood variations is a big hurdle.

Common issues include natural variations in wood, installation issues, and color matching problems. To tackle these, we must carefully consider the grain direction and wood selection. The right wood species can help reduce natural variations.

Dealing with Natural Variations

To handle natural wood variations, choose the right wood species and think about the grain direction. This approach can make the wood look more uniform.

Addressing Installation Issues

Installation problems can be fixed by aligning and securing the wood properly. This ensures the grain pattern looks even and without gaps.

Solving Color Matching Problems

Color matching issues can be solved by picking wood with similar colors and considering the grain direction. This helps create a unified look and hides color differences.

Understanding wood grain matching challenges helps us create stunning wood patterns. By focusing on grain direction and wood selection, we can enhance our projects’ beauty.

Maintaining Consistency Across Multiple Cabinet Sections

Striving for excellence in custom cabinetry means keeping everything consistent. Visual continuity and panel matching are key to a cohesive look. We make sure the wood grain flows smoothly, creating a professional finish.

We focus on visual continuity by picking and arranging wood grain patterns carefully. We consider the wood’s natural variations and how cutting affects the grain. This way, we achieve a balanced and appealing look for the cabinet.

Panel matching is also vital for consistency. We match the grain patterns of panels to create a seamless joint. Using digital software and precise tools, we ensure perfect panel matching quality.

By emphasizing visual continuity and panel matching, we create top-notch custom cabinets. Our skill and attention to detail help turn architectural dreams into reality. This results in truly exceptional products.

Conclusion: Achieving Excellence in Cabinet Design Through Precise Grain Matching

To excel in cabinet design, you need to understand wood grain matching well. This includes finding the right materials and using sequence matching techniques. Every step is crucial for creating beautiful, custom cabinets.

We’ve looked at the basics of wood grain patterns and how cutting affects them. We’ve also talked about the tools and tech for analyzing grain. Plus, we’ve covered the science behind matching grains, choosing materials, and advanced veneer sequencing.

The secret to success is careful planning and quality control. This ensures that grain patterns are consistent in large cabinet projects. By perfecting these methods, designers and makers can create cabinets that impress clients and set new standards in the field.

FAQ

What are the different types of wood grain patterns?

Wood grain patterns can be straight, irregular, or figured. Each type of wood has its own unique grain. This can change how the wood looks and how well it matches.

How do natural variations in wood species affect the wood grain matching process?

Wood’s natural features like knots and color changes can affect matching. It’s important to know these variations when picking and arranging wood for a smooth look.

What is the impact of cutting techniques on the appearance of wood grain?

How wood is cut can change its grain’s look. Cutting methods like sawing or slicing can make different patterns. This affects how the wood looks together.

What are the essential tools and technologies used in grain pattern analysis?

For analyzing grain patterns, we use digital software, physical tools, and cameras. These help pick the right wood for a seamless look.

How do material selection and sourcing strategies impact the wood grain matching process?

Choosing the right materials and where to get them is key. It helps create a smooth grain pattern in custom cabinets.

What are the advanced techniques used in veneer sequence matching?

Techniques like book matching and slip matching are used. They help make grain patterns look continuous and smooth.

How does the planning process for large cabinet runs impact visual continuity?

Planning for big cabinet projects needs careful panel matching and material picking. This ensures the grain flows well across the cabinets.

What are the key manufacturing processes involved in achieving seamless integration?

Important steps include CNC cutting and planning the assembly. These, along with choosing the right veneer, help make cabinets that look great together.

What are some common challenges in wood grain matching, and how can they be addressed?

Challenges include dealing with wood’s natural differences and matching colors. Knowing grain direction and picking the right wood helps solve these problems.

How can consistency be maintained across multiple cabinet sections?

Keeping cabinets consistent is key for a unified look. Focus on matching panels and ensuring grain patterns flow smoothly between sections.

floating vanity design

Floating Vanities: Engineering Solutions for Wall-Mounted Millwork

We create high-end custom cabinetry that turns architectural dreams into reality. Our team works with architects and contractors to design and make unique pieces. This includes floating vanities that need careful structural support and wall mounting.

A floating vanity can make any space look amazing. But, it’s key to think about the structural loads and wall mounting needs. We aim to guide you through engineering solutions for wall-mounted millwork. We focus on floating vanity design and the need for strong structural support.

Exploring floating vanities, we’ll cover the main principles, benefits, and challenges. We’ll talk about the importance of proper structural support and wall mounting. This ensures the stability and safety of these pieces.

Key Takeaways

  • We provide high-end custom cabinetry manufacturing solutions for architects and contractors.
  • Floating vanity design requires precise structural support and wall mounting.
  • Our team of experts works closely with clients to bring architectural vision to life.
  • Proper structural support is crucial for the stability and safety of floating vanities.
  • We focus on bridging architectural vision with manufacturing reality through precision and expertise.
  • Our solutions include wall-mounted millwork pieces that meet the unique needs of each project.

Understanding the Basics of Floating Vanity Design

A floating vanity can make a bathroom feel more open and elegant. It looks like it’s floating on the wall, making the space seem bigger. To get this look, you need to know about weight distribution, installation methods, and bracket systems.

Our team has lots of experience in making custom cabinets. We’ve worked with architects and contractors to make their designs come to life. We want to share our knowledge to help you create beautiful and useful bathrooms.

Key Considerations for Floating Vanity Design

When designing a floating vanity, there are a few things to think about. These include:

  • Weight distribution: making sure the vanity doesn’t tip or fall
  • Installation methods: picking the best way to attach the vanity to the wall
  • Bracket systems: choosing strong and dependable brackets to hold the vanity

By thinking about these points, you can make a beautiful and useful floating vanity. Our skills in making custom cabinets can help you reach your design goals.

With the right weight distribution, installation methods, and bracket systems, you can make a stunning floating vanity. It will make the bathroom look better. Our team is ready to help you with your next project.

Structural Requirements for Wall-Mounted Millwork

When you’re planning to install wall-mounted millwork, it’s key to think about the structure. You need to know the load bearing strength of the wall and the cantilever design of the millwork. Our team has a lot of experience working with architects and contractors. We create custom cabinetry that fits each project’s needs.

The load bearing strength of the wall is very important. It tells us how much weight the wall can handle without breaking. The cantilever design of the millwork also matters a lot. It affects how stable and safe the installation will be. We make sure our designs are both useful and look good.

  • How much weight the wall can hold
  • The impact of the cantilever design on stability
  • The type of material and its effect on load bearing

We carefully check these points to make sure our custom cabinetry is safe and fits each project’s needs. This way, we ensure the installation is both strong and looks great.

Load-Bearing Calculations and Weight Distribution

When we design and install wall-mounted millwork, we must think about the wall’s and millwork’s weight. We need to figure out the wall and millwork’s maximum weight they can hold. It’s also important to know the difference between point load and distributed load.

A safety factor is key in these calculations. It makes sure the millwork can handle different loads and stresses. Our team uses special software and methods to find out how much each piece can hold. We consider each project’s unique needs.

Maximum Weight Capacity

To find the maximum weight, we look at the wall type, millwork type, and the space’s use. This helps us figure out the load-bearing capacity. We make sure the millwork meets safety standards.

Point Load vs. Distributed Load

It’s important to know the difference between point load and distributed load. A point load is focused on one spot, while a distributed load spreads out. We consider the load type and weight distribution. This ensures the millwork can handle expected loads.

Safety Factor Considerations

A safety factor is crucial in load-bearing calculations. It adds a buffer against unexpected loads or stresses. We use a safety factor in our calculations. This makes sure the millwork can handle various loads and stresses, giving our clients peace of mind.

By focusing on weight distribution, load-bearing capacity, and safety factor, we create safe and functional wall-mounted millwork. Our team is committed to delivering top-quality solutions that meet each project’s unique needs. We aim to exceed our clients’ expectations with our work.

Advanced Bracket Systems and Support Mechanisms

We know how crucial bracket systems and support mechanisms are for wall-mounted millwork. Our team has created custom solutions for every project. We use top-notch mounting hardware for a stable and dependable setup.

Choosing the right bracket systems and support mechanisms is key. We consider the millwork’s weight, size, and the wall type. We have adjustable brackets and hidden supports for a clean look.

  • Load-bearing capacity
  • Material durability
  • Corrosion resistance
  • Aesthetics and design

By picking the best bracket systems and support mechanisms, we ensure a lasting solution. This meets the needs of architects and contractors for custom cabinetry.

Our skill in creating custom bracket systems and support mechanisms helps bring architectural dreams to life. We offer precision and expertise for outstanding results.

Essential Hardware and Installation Components

Installing wall-mounted millwork needs the right tools and parts. This includes choosing the right mounting hardware, anchoring systems, and support frame. These ensure a secure and stable setup.

We team up with architects and contractors to create custom cabinetry. Our experts have a lot of experience with different mounting brackets, anchoring systems, and support frames. This lets us offer solutions that fit each client’s needs.

  • Load-bearing capacity: The hardware and anchoring systems must handle the millwork’s weight.
  • Material compatibility: The support frame and brackets must match the millwork’s materials.
  • Aesthetics: The hardware and parts should look good and match the design.

By choosing the right hardware, anchoring systems, and support frame, we ensure a great installation. It meets the client’s needs and goes beyond their expectations.

Professional Installation Methods and Best Practices

Installing wall-mounted millwork requires proper wall preparation. This ensures a secure and stable mount. We check the wall’s strength, look for damage, and fix any issues before starting.

A good mounting process is key to success. We measure and mark the wall carefully. Then, we choose the right brackets and hardware. This way, we ensure a safe and durable installation.

Common mistakes include bad wall prep, wrong bracket choice, and weak anchoring. To avoid these, we follow a detailed step-by-step plan. This includes:

  • Doing a full site check to find challenges and chances
  • Creating a custom installation plan for each project
  • Using top-quality materials and hardware for a strong install

By focusing on good wall prep, a detailed mounting plan, and following best practices, we ensure a lasting and successful install. Each project gets the unique care it needs.

Installation StepDescription
Wall PreparationAssessing the wall’s structural integrity and making necessary repairs
Mounting ProcessExecuting the installation with precision and attention to detail
Installation MethodsFollowing established best practices to guarantee a safe and durable installation

Material Selection for Optimal Performance

Choosing the right materials is key when making wall-mounted millwork. Our team knows a lot about different materials like wood, metal, and glass. The best material makes sure the product works well and is strong.

Each material has its own strengths. Wood is loved for its beauty and flexibility. Metal is strong and durable. Glass adds elegance and sophistication.

When picking materials, we think about a few important things. These include how well it holds weight, how it looks, and if it can handle moisture.

  • Load-bearing capacity
  • Weight distribution
  • Moisture resistance
  • Aesthetic appeal

We’re proud of our skill in picking materials. We aim to meet and exceed our clients’ needs. Whether you’re designing or building, we can help make your ideas come to life.

MaterialPropertiesAesthetic Appeal
WoodDurable, versatileNatural beauty
MetalStrong, durableModern, sleek
GlassMoisture-resistant, elegantSophisticated, luxurious

Incorporating Design Aesthetics with Structural Integrity

Creating stunning wall-mounted millwork is all about design aesthetics. Our team works with architects and contractors to make custom solutions for each project. We balance structural integrity with design aesthetics to make pieces that look great and work well.

Key things to think about include:

  • Choosing materials that are both strong and look good
  • Making pieces that are both useful and attractive
  • Keeping the structural integrity of the piece while focusing on design aesthetics

By teaming up with architects and contractors, we craft custom solutions that fit each project’s needs. This way, we ensure the design aesthetics and structural integrity are both top-notch. Our goal is to create pieces that are both beautiful and functional, meeting the highest standards of quality and craftsmanship.

Maintenance and Long-Term Structural Stability

Regular maintenance is key to keeping wall-mounted millwork stable and durable. Our team has developed special maintenance and repair methods. These can be adjusted for each project’s unique needs.

Important steps for keeping wall-mounted millwork in good shape include:

  • Regular checks to spot problems early
  • Cleaning and upkeep of hardware and parts
  • Fixing damage or wear quickly to stop it from getting worse

By focusing on maintenance and structural stability, we make sure our millwork stays safe, works well, and looks great. This ensures long-term durability and value for our clients.

Conclusion: Implementing Your Floating Vanity Project

Creating your floating vanity design needs careful planning and skilled work. At ABC Millwork, we’re proud of our team’s experience. They work with architects and contractors to make custom cabinets that look great and work well.

Looking for a modern or traditional style? Our engineers can come up with custom solutions for your wall-mounted vanity. They use advanced systems to make sure your vanity is stable and lasts long. This way, your vanity will not only look good but also be strong and reliable.

Starting your floating vanity implementation project? Our team is ready to help you. We’ll help with everything from figuring out how much weight it can hold to installing it. We’re all about quality and detail, so you can count on your vanity to be a great addition to your space.

FAQ

What defines a floating vanity?

A floating vanity looks like it’s floating on the wall. It adds elegance and makes spaces feel more open. This look is achieved through careful design and installation.

What are the key engineering principles behind floating vanity design?

The design of floating vanities relies on weight distribution and installation methods. These ensure the vanity is stable and strong. The right brackets are also key.

What are the benefits of wall-mounted solutions like floating vanities?

Floating vanities offer a sleek look and more floor space. They’re also easy to clean. These features make them a top choice for modern homes.

How do you calculate the load-bearing capacity for wall-mounted millwork?

To figure out the load-bearing capacity, we look at the maximum weight and safety factors. Our team uses advanced tools to ensure the millwork is safe and sturdy.

What types of advanced bracket systems and support mechanisms are used for floating vanities?

We’ve developed custom bracket systems for each project. These systems ensure the vanity is stable and lasts long.

What are the essential hardware and installation components for floating vanities?

Essential components include mounting brackets and anchoring systems. Our team works with architects to pick the right parts for each project.

What are the best practices for professionally installing wall-mounted millwork?

Our team follows best practices for installation. This includes proper wall prep and a step-by-step mounting process. We avoid common pitfalls to ensure safe and reliable installation.

How does material selection impact the performance of floating vanities?

Choosing the right materials is crucial for wall-mounted millwork. Our team has experience with wood, metal, and glass. We ensure the materials provide optimal performance and stability.

How can design aesthetics be balanced with structural integrity for floating vanities?

Balancing design and structure is key for stunning millwork. Our team works with architects to blend aesthetics with function. We incorporate modern trends and create custom solutions.

What are the maintenance and long-term structural stability considerations for floating vanities?

Maintenance and stability are vital for the longevity of wall-mounted millwork. Our team has developed techniques for upkeep and repairs. This ensures the millwork remains safe and functional over time.